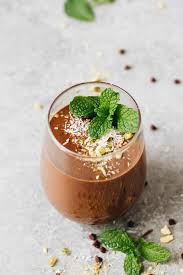
I knew I would be in a hurry the other morning with an early clinic so I threw together the ingredients for this deliciously thick smoothie the night before and blitzed them in the morning. If you like your smoothie thinner, add more liquid. If you prefer it thicker add less liquid and eat from the glass with a spoon like I do – yum!
For 1 hungry adult:
Remember to consult my “larder & shopping” section for unusual ingredients
2 rounded dsp high quality unsweetened protein powder of your choice – e.g. sprouted rice protein, hemp protein, Sun Warrior protein powder (or for a dairy option try Solgar Whey-to-Go Vanilla)
200ml unsweetened additive-free milk of your choice: almond, hemp, coconut milk, milk or (if you can eat gluten) oatmilk
1 ripe organic pear, washed
1 heaped tsp cocoa powder, organic if possible
1 heaped tbs flax or chia seeds, ideally soaked in water overnight
Optional: A pinch of pure stevia powder or a few drops of stevia drops to sweeten
1. Cut the flesh off the pear (no need to peel) and throw in the liquidiser.
2. Add all the other ingredients. Blitz for a minute until smoothish. Enjoy.
Variation:
Pear and ginger smoothie: drop the chocolate and substitute 1 dsp grated fresh ginger root (peeled before grating).
Why this smoothie is better for you: It’s almost always best to chew your food rather than grinding it up and drinking it. This is because food you have to chew stays in your stomach longer and makes you feel fuller longer too. Chewing your food mixes it with your saliva, starting the digestive process (with the enzyme salivary amylase) in the mouth so “chewing” this smoothie rather than gulping it down helps digestion enormously. Soaking nuts and seeds overnight starts the process of sprouting them, making their nutrients more digestible. Chia and flax, when ground, are a rich source of omega 3 fatty acids and minerals. Protein is an essential component of a good breakfast, helping regulate blood sugar to keep energy levels and mood even through the morning. Avocados are rich in monounsaturated fatty acids and vitamin E, great for moisturising skin and body fromwithin. Yoghurt and keffir provide friendly bacteria important for a healthy digestion, clear skin and stable mood. Fermenting makes the soya or dairy milk easily digested. Lecithin granules help emulsify (digest) fats and are a great source of phospatidyl choline. Phos choline is only found in egg yolks, lecithin and organ meats. Chlorella and spirulina are seaweeds so are rich in iodine. Iodine is needed for the body to effectively eliminate oestrogen (oestradiol), which in excess causes breast and other hormone-driven cancers. Fluoride, chlorine and wheat flour products suppress iodine utilisation in the body.
Wholegrain millet is an earthy tasting fluffy grain when cooked. It’s really cheap and is great for mopping up sauces/juices. Its a far healthier choice than couscous but looks really similar when cooked. Make sure to buy millet wholegrains instead of the flakes (which will become porridge!). Millet is naturally gluten-free and high in nutrients whereas couscous is made from white flour, low in nutrients.
Enough to feed 3 people as an accompaniment (NOT suitable for SC diet)
Put your millet into a small saucepan. Add the boiling water and cook, covered, for 8-10 mins. No need to stir.
The grains are done when you can see little steam holes in the surface, the water will be absorbed and it looks fluffy like couscous. Make sure you don’t put the millet in cold water or cook for too long or the result won’t be nice.
Variation:
After cooking, drizzle a little extra virgin olive oil on top of the millet, and sprinkle over some ground paprika. This looks lovely in a serving bowl. You could also sprinkle on some fresh coriander leaves.
Why this is good for you: Millet grains are a rich source of magnesium and also of vitamin B17. Magnesium helps clear toxins from the body and also aids relaxation, helping you stay chilled under pressure. Its also great value. Vitamin B17 is a powerful nutrientwith action against cancer cells. Vitamin B17 is also found in many bitter tasting seeds such as those of apples, pears as well as bitter apricot kernals. Millet is an alkaline grain, which helps support bone density, joint health and vitality generally. An alkaline food is one that after the body has “burned” it for energy, leaves an alkaline residue. Fruits, vegetables, beans, pulses, millet, buckwheat and apple cider vinegar are alkaline whereas cheese, milk, wheat, meat, fish, and eggs are acidic. Acidic foods, when not balanced by alkaline ones, can cause skin, digestive, bone, joint, kidney and heart problems. Eating about 80% of your diet as alkaline foods is associated with a longer healthy lifespan.
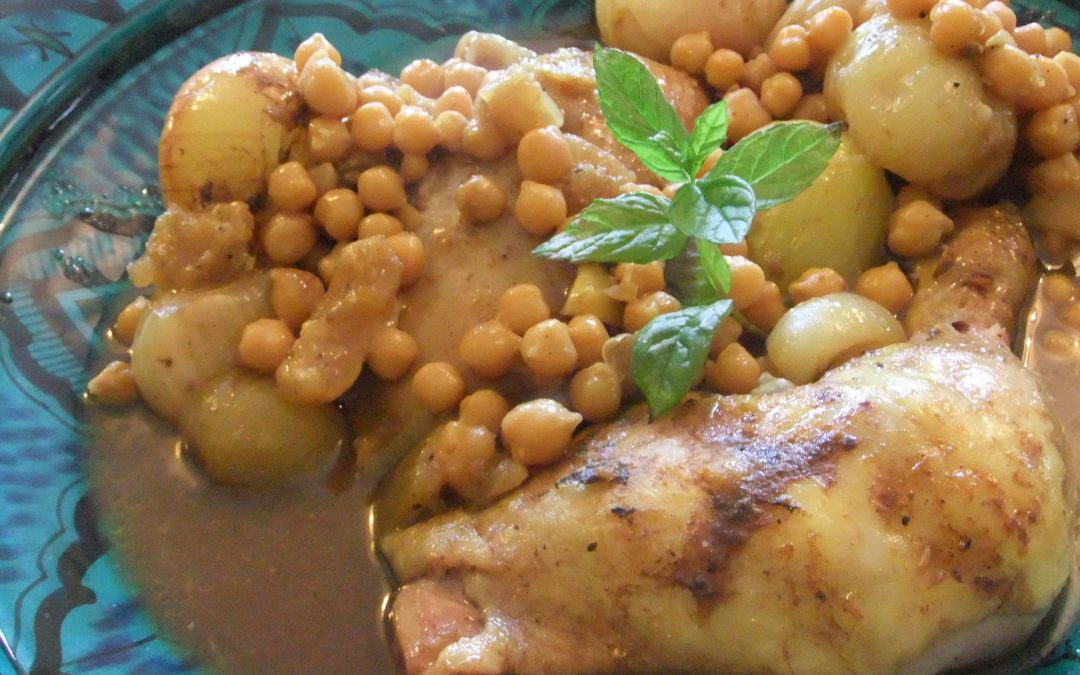
Now the autumn chills are setting in this is a lovely slow-cooked recipe to warm you up. It’s richly-flavoured but really mild. It’s ideal if you are cooking one meal to please meat eaters and people who want to eat less meat at the same time. People can avoid the meat part of the dish and bulk up on extra chickpeas and vegetables and have some delicious fluffy cooked millet grains on the side. Using meat on the bone makes this really flavourful. I usually serve this with some sort of steamed green vegetable (like green beans or dark green cabbage) or a green salad. To stretch things out a bit and save money adding cooked millet to soak up the juices is a winner. If you are new to super-nutritious and super-inexpensive millet, check out my post on how to cook ithttps://annacollins.ie/how-to-cook-millet-i-cant-believe-its-not-couscous/
For 2:
2 mugs (around 450ml) of leftover veg or chickpea cooking water, or plain filtered water
300g small onions or large shallots (large onions will do if you cant get small ones)
1 mug home-cooked chickpeas (reserve the liquid) or a 400g can of chickpeas
2 large cloves garlic, peeled and roughly quartered or sliced
½ a medium size preserved lemon*, deseeded and roughly cut up into 8 pieces – at a pinch you could use ½ a fresh lemon (skin and pith only). Buy ready-made, or use the easy recipe below and leave to mature for at least 2 weeks before using.
2 chicken breasts on the bone or chicken legs (organic if possible)
1 heaped teaspoon ras el hanout*(see simple recipe below, or buy ready-made) For unusual ingredients see “larder & shopping” section of this blog
1. Put a heavy bottomed saucepan or cast iron pot on a medium heat to warm with the 2 mugfuls of stock or water. Put the chicken legs or breasts at the bottom of the pot. Peel and add the onions, ras al hanout, chickpeas, preserved lemon and garlic. Put the lid on, give everything a gentle shake to mix everything up. You want the water to almost cover everything.
2. Simmer gently for 1½ to 2 hours (stirring occasionally to coat everything in the liquid and spices) until the onions are translucent and the chicken is falling off the bone.
Money-saving health-boosting tip:
Serve this with cooked millet. Cooked millet wholegrains are a healthy replacement for couscous, but very similar in appearance and texture. For instructions on how to cook, click the “grains” section in the tag cloud on the left of this blog, or search for “how to cook millet” in the search box.
How to make ras el hanout
Traditionally, ras el hanout contained a blend of 40 different spices. This streamlined version includes many of the main spices of the traditional mixture. Keep this mix in an airtight glass jar in a dark place to preserve the aromas for many months. If you like this spice mix, you will use it again and again as tagine stews are really simple to make. If you own a coffee or spice grinder, you can grind your own spices for extra flavour. Ras al hanout
Makes ½ a medium size jar of ras el hanout:
2 teaspoon ground cumin
2 teaspoon ground ginger
3 teaspoon turmeric
1½ teaspoon ground cinnamon
1½ teaspoon freshly ground black pepper
1 teaspoon ground white pepper
1 teaspoon ground coriander seeds
1 teaspoon cayenne
1 teaspoon ground allspice
1 teaspoon ground nutmeg
½ teaspoon ground cloves
Instructions: Mix spices together. Store airtight in a dark place to preserve the potency of the spices.
How to make preserved Lemons
These have a distinctive flavour its hard to replicate. These are easily made if you cant find a local Halal shop near you or don’t live near Fallon & Byrne. They take at least 2 weeks before they are ready and will keep for a year. I usually keep mine in the fridge but its not absolutely necessary. These take about 2 weeks to mature.
A carton of Atlantic sea salt or Himalayan (pink) salt
10 unwaxed lemons, organic if possible, scrubbed well
A large glass jar with lid
1. Standing a lemon on one end make a cut down the centre with a sharp knife until you have cut 2/3 of the way down.
2. Now turn the lemon upside down and rotate it 90 degrees. Make another cut at right angles to the original cut, also 2/3 of the way down the fruit.
3. Pack the slits with salt and place in the jar. Continue until the lemons are all packed tightly in the jar.
4. Over the next week or two you will see liquid coming out of the lemons. This is normal. When using a lemon for cooking you will need to discard the seeds and rinse off the salty liquid. After 2 weeks the lemons are ready to use.
Why this is good for you: Spices in the ras al hanout are a fantastic source of antioxidants to help your health. Spices help reduce inflammation in the digestive system. Research shows that spices also boost liver function and help keep your skin clear and young-looking. Traditionally, Moroccan dishes are cooked on a low flame for a long time. Modern, cheffy recipes telling you to brown the meat are neither as authentic nor as healthy as the traditional ways. Cooking foods at low temperature (stewing) rather than at high temperature (frying, roasting or grilling) is better because low temperatures produce far fewer damaging free radicals than high temperature cooking. Fewer free radicals and more antioxidants from the spices means slowing down the ageing process, reducing the risk of chronic or life-threatening disease, and helping your heart. Stewing meat on the bone releases substances into the food that help support collagen production. This helps your digestive system repair itself and also helps maintain good firm skin and bones in later life.
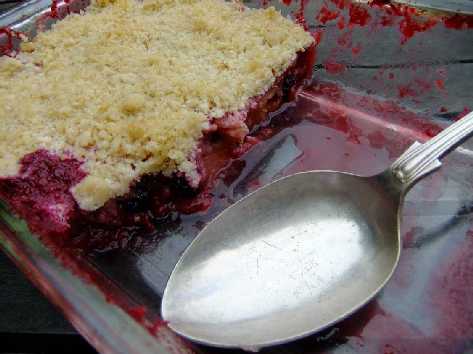
We continued to use our glut of cooking apples yesterday and ate this warm out of the oven. You could use eating apples (such as French golden delicious) instead of cookers, in which case you don’t need to sweeten the apples at all. If you have one, use a food processor to blitz the oats to make the crumble super-nice. If you don’t have one, use gluten-free oat flour from the health shop (if you can eat gluten, standard oat flour is fine). You can buy miniature food processors in Argos or department stores and save yourself time and effort.
For 6 people:
1 kg cooking apples
1 tbs water
20 drops stevia (or 2 rounded tbs xylitol)
Alternatively use 1kg sweet eating apples (e.g. French golden delicious) and omit the stevia/xylitol
Optional: handful of blackberries Remember to check out my larder & shopping section for unusual ingredients
Crumble topping:
100g (1¼ cups) gluten-free porridge oats or gluten-free oat flour (or normal porridge oats/oat flour if you can eat gluten)
50g (1/2 cup) ground almonds
40g (3 level tbs) virgin coconut oil
1-2 rounded dsp xylitol (amount depends how sweet you like the topping)
1. Into a large saucepan put 1 tbs water and 20 drops of stevia (or the xylitol). Put on a low heat to warm while you peel and slice the apples into the pan. Stir around to make sure the stevia/xylitol is evenly distributed. Cover and cook gently for around 10 minutes until the apples are softened.
2. Preheat oven to 170C (for fan oven, for non-fan oven, 185C)
3. Meanwhile make the crumble. Blitz the porridge oats in the food processor or use the gluten-free oat flour. Tip into a bowl with the ground almonds, a dessertspoon of xylitol/coconut sugar and the coconut oil. Chop the coconut oil into the mix with a knife until it resembles breadcrumbs. Taste for sweetness and, if you like, add another dessertspoon of xylitol/coconut sugar and mix around.
4. Grease a 20x30cm pyrex dish or roasting tin – a bit smaller or larger won’t matter much but this size gives you a nice depth of dessert.
5. Empty the cooked apples into the dish and flatten with a spoon. Scatter the crumble evenly over the top.
6. Cook in the oven for around 30 minutes until slightly golden.
6. Serve on its own or with one of the following:
Dairy-free: natural coconut yoghurt (e.g. Abbot Kinneys or Coyo) sweetened with a few drops of vanilla extract
Dairy: a blob of Greek yoghurt
Variations:
Instead of 100g oats you can use 50g gluten free oat flakes and 50g buckwheat flakes, all blitzed in the food processor to a coarse flour. If you are able to eat gluten, you can also buy oat flour in health stores and use this instead. NB. Unless certified gluten-free, oats are often contaminated with wheat (gluten).
Add a pinch of ground cloves and a teaspoon of cinnamon to the apple mixture for extra health benefits and delicious fragrance
You could also use coconut sugar instead of xylitol for extra caramel flavour and crunch – its delicious and contains some minerals.
Why this is better for you: Apples, especially cooking apples, are a rich source of a soluble fibre called pectin. Soluble fibres like pectin feed beneficial bacteria in your gut. Pectin binds to harmful toxins (e.g. mercury from dental fillings and tune, or arsenic from non-organic rice) in the bowel. This makes them inert and aids their excretion. Oats also contain soluble fibre. Coconut oil is a rich source of medium chain triglycerides that help boost energy rather than being stored as body fat. Unlike most other oils, coconut oil is stable at high temperatures and so is safe to use in cooking. Using pure stevia (as herb) as your zero calorie sweetener for the apples is a 100% healthy form of sweetening. Xylitol is made from birch tree sap and causes fewer spikes in blood sugar than “normal” sugar or honey. I use xylitol for the crumble as stevia didn’t really seem to sweeten the topping enough when I experimented with it. Sweeteners such as xylitol, honey, coconut sugar, molasses and maple syrup are still not actively good for you though, so sweetened foods like this dessert are best kept for occasional treats not everyday eating
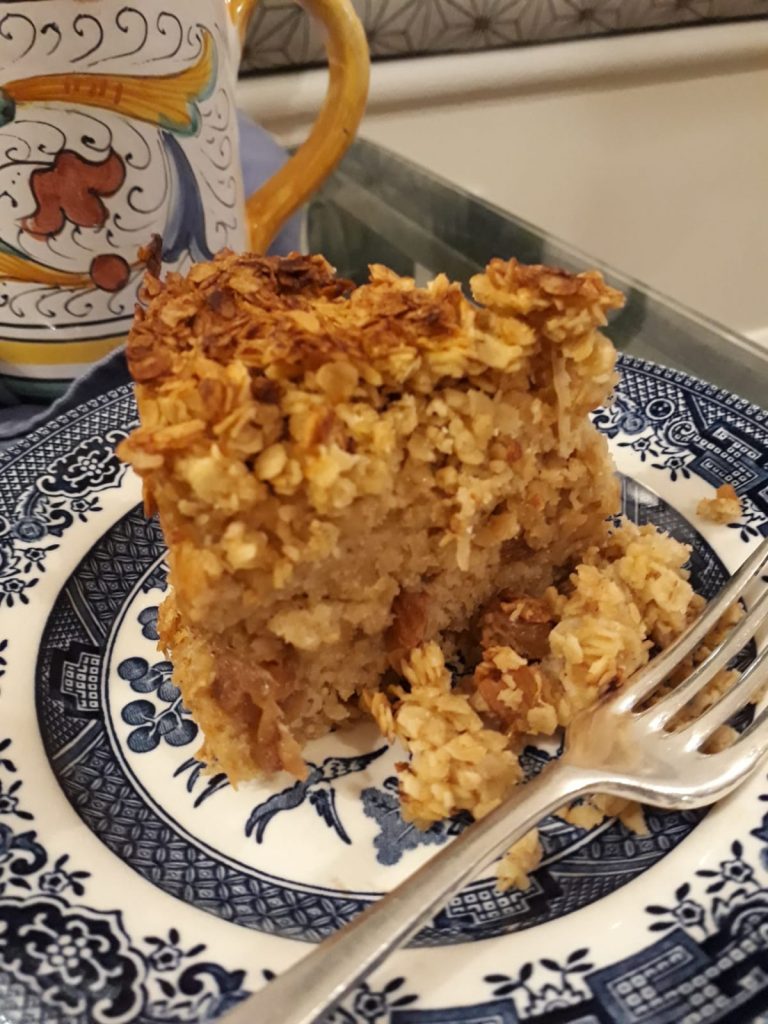
These are like a cross between a cake and a flapjack and are great for lunchboxes if you feel the need to put baked treats in. You can also eat them warm, topped with a dollop of natural coconut yoghurt or (for dairy) Greek sheep’s yoghurt with a few drops of vanilla extract stirred in. For these, I adapted Theodora Fitzgibbon’s apple flakemeal layer cake recipe into a traybake and swapped butter for virgin coconut oil.
Makes 16 squares For unusual ingredients, see “larder & shopping”.
325g cooking apples
1 rounded tsp ground cinnamon
A generous pinch of nutmeg, if you have it
30g raisins
50g virgin coconut oil (or butter, if you eat dairy)
1½ rounded tbs rounded tbs honey
1 rounded dsp blackstrap molasses
175g gluten-free porridge oats (or normal if you eat gluten)
Grated rind of an organic lemon (if you cant get organic, scrub in hot water before using)
Juice ½ lemon
1 egg
Turn on the oven to 180C (165C fan).
Line a 20-20cm baking tray or brownie tin with greased baking paper.
In a large saucepan on a very low heat gently melt the honey, molasses and coconut oil. A tip for getting the honey or molasses easily off the spoon is to heat the spoon first in a jug of boiling water.
Meanwhile chop the raisins, peel and grate the apples and mix everything together with the lemon juice and rind. The antioxidants in the lemon prevent the apples turning brown. When the oil and honey mixture is melted, add the oats, cinnamon, nutmeg, apple mixture to the saucepan and mix to combine. Finally, beat the egg, add in and mix lightly.
Turn the mixture into the prepared tin, even out and smooth down with a knife or spatula and bake, checking after about 20 minutes. It should take around 30 minutes and be only very slightly browned on top and at the edges. It will still be moist and a little springy to the touch.
Why this recipe is better for you: Virgin coconut oil is a healthy oil rich in medium chain triglycerides that help increase energy levels in your body and brain rather than being stored as fat in your body. Cooking apples are a very rich source of pectin, which binds to toxic materials in the bowel until they can be eliminated safely. Both apples and oats contain soluble fibre which nourishes beneficial bacteria in the gut. Beneficial bacteria help support immunity, clear skin and regulate bowel function. Honey, molasses and almost all other sweeteners are still high in natural sugars so if you want the ideal diet, aim not to eat them more than a couple of times a week. For transitioning from a high sugar to a low sugar diet though, these are ideal. Molasses is high in iron and chromium so it does have some benefits as well as its lovely toffee flavour. Stevia is the only exception to this as it contains no sugars at all and is 100% healthy.
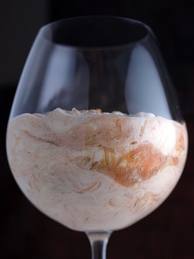
I adapted this from Nigella’s recipe that’s loaded with sugar and based on dairy cream, which many people with dairy sensitivity don’t tolerate very well. If you are one of these check out my dairy-free rhubarb food recipe. I’ve been working for some time on a dairy-free version of cream and now I think I’ve cracked it – the result has that lovely “mouth-feel” you get from cream and is pretty good for you too. Use the rosiest, pinkest rhubarb you can find for your rhubarb food. Or (if you can be bothered) use cochineal, a natural pink food colouring, or some beetroot powder (health stores), to achieve the desired effect. See “larder & shopping” for more info on unusual ingredients like cochineal.
For 6
1 kg rhubarb, washed, trimmed and coaresly sliced
4 heaped tbs xylitol* or 30 drops of pure stevia
1 teasp vanilla extract*
500ml whipping cream
Optional: 4 sprigs of mint to decorate
Optional colouring: cochineal extract or beetroot powder (from health shops)
*Check out my “larder & shopping” section for where to buy all unusual ingredients
Preheat the oven to 190C. Mix the rhubarb and the xylitol together in an ovenproof dish.
If the rhubarb is wet don’t add water, otherwise add a few tablespoons (45ml). Cover with foil or a tight fitting lid and bake for 45-60 minutes until the fruit is completely soft. Allow to cool slightly before straining off the juice if there is a lot. [If you like, you can use this juice to add to a glass of prosecco or champagne, or for drizzling over natural yoghurt or porridge].
Puree the rhubarb with 1 tsp vanilla extract and process until smooth. Ajust the sweetness if its too sour for you, and, if you like, the natural colouring to make everything pink. I recently used green rhubarb and needed about 30 drops of cochineal to get the pink colour I wanted. If you don’t own a liquidiser or food processor you could simply beat it with a spoon for a rustic effect. Chill this mixture. Put a large bowl (for whipping your cream) in the fridge as you get a better effect if everything is very cold.
Whisk the cream in the chilled bowl till thick but not stiff. Carefully swirl in the chilled rhubarb puree and pile into 4 glasses. If you have some mint, place a sprig on each. Refrigerate until needed.
Variation:
To make this recipe even healthier, use stevia drops instead of xylitol. Note: if you use stevia, take the dessert out of the fridge half an hour before you want to eat. You will taste the stevia’s sweetness better if the food is not too cold.
Why this recipe is better for you Using xylitol (or stevia) instead of sugar means you are not releasing vast amounts of sugar into your bloodstream by eating this dessert. Xylitol is safe for diabetics for this reason. Amazingly, sugar is much more harmful for your heart then cream! It is not cholesterol per se, but the oxidisation (damage) of cholesterol and the inflammatory process, that damages arteries. There are two types of LDL (so-called “bad” cholesterol) – one type is large and fluffy and harmless and essential for your brain function, the other has tiny sticky particles that are problematic in excess. Only private labs test for these important cholesterol subfractions. The total cholesterol and LDL cholesterol figures you get from your doctor are not really very useful in predicting cardiac risk. Ferritin levels, trigluceride and GGT levels are much much better predictors. Unfortunately it takes average 20-25 years for scientific research to become common in medical practice. Sugar increases oxidation of cholesterol and cell damage. So if you want a healthy heart, reducing sugar is one of the keys. We now eat much less saturated fat than 50 years ago and yet heart disease has skyrocketted. Sugar also depletes B vitamins. B vitamins are needed to keep artery-damaging homocysteine at low levels. If you decide to use stevia instead of xylitol, this zero-calorie sweetener is even healthier. See “larder & shopping” for details.
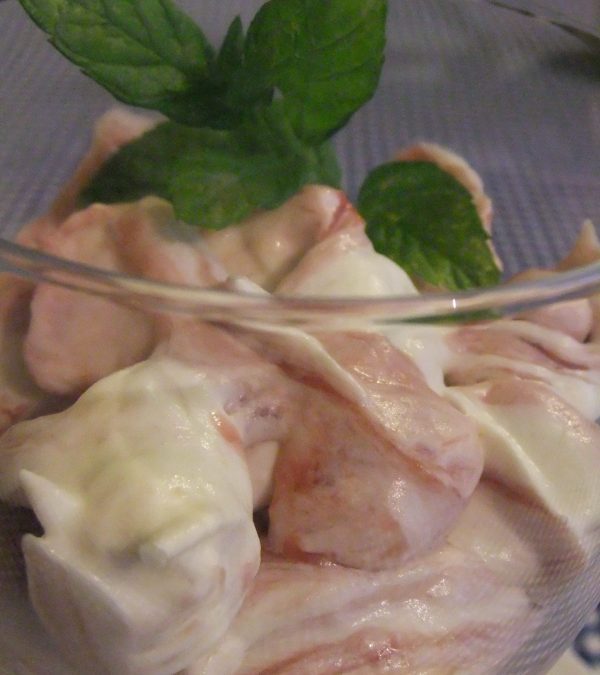
I adapted this from Nigella’s recipe that is far too sugary and based on dairy cream, which many people don’t tolerate very well. I’ve been working for some time on a dairy-free version of cream and now I think I’ve cracked it – the result has that lovely “mouth-feel” you get from cream and is really good for you too. Use the rosiest, pinkest rhubarb you can find. Alternatively you can use cochineal*, a natural non-toxic pink food colouring, to achieve a pink colour. Or not bother…
For 6
1 kg rhubarb, trimmed and coarsely sliced
4 heaped tbs xylitol* or 30 drops pure stevia (health shops)
2 teasp vanilla extract*
400g tub Coyo or Abbot Kinney’s Greek style plain coconut yoghurt, straight from the fridge*
400g tub natural unflavoured soya or almond based yoghurt, straight from the fridge*
Optional: cochineal food colouring or beetroot powder (health shops)*
Optional: 4 sprigs of mint to decorate *Check out my “larder & shopping” section for where to buy all unusual ingredients
Preheat the oven to 190C. Mix the rhubarb and the xylitol together in an ovenproof dish. Don’t add water. Cover with foil or a tight fitting lid and bake for 45-60 minutes until the fruit is completely soft. Allow to cool slightly before straining off the juice if there is a lot of it. [You can save this delicious juice for later to add to a glass of prosecco or champagne, or for drizzling over natural yoghurt or porridge].
Puree the rhubarb with 1 tsp vanilla extract and process until smooth. Add more xylitol/stevia if needed, and, if you like, cochineal or beetroot powder colouring to make everything pink and blitz or beat again. I recently used green rhubarb and needed about 30 drops of cochineal to get the pink colour I wanted. If you don’t own a liquidiser or food processor you could simply beat the rhubarb with a spoon for a rustic effect. Chill this mixture.
Now empty the 400g tub of Coyo, 8 rounded tbs of natural soya yoghurt and a teaspoon of vanilla extract into a bowl. Whisk until well mixed and lump-free – this only takes a minute. Fold in the rhubarb puree and pile into 4 glasses. If you have some fresh mint, place a sprig on each. Refrigerate until needed.
Variation:
To make this recipe even healthier, use stevia drops instead of xylitol. This will vary depending on the rhubarb. Note: if you use stevia, take the dessert out of the fridge about half an hour before you want to eat. You will taste the stevia’s sweetness better if the food is not too cold.
Why this recipe is better for you Coconut “yoghurt” contains vitality-boosting medium chain triglycerides or MCTs. MCTs are used directly by your body to make energy instead of being stored as fat – good news if you don’t want to gain too much weight. MCTs are also fantastic for brain function, especially for people experiencing cognitive decline. Using xylitol instead of sugar means you are not releasing vast amounts of sugar into your bloodstream by eating this dessert. Xylitol is safe for diabetics for this reason. Sugar increases oxidation, ageing and cognitive problems. So if you want a healthy body and mind, reducing sugar is one of the keys. Sugar depletes vitamins and minerals and lowers the immune-boosting activity of the thymus gland. If you decide to use stevia instead of xylitol, this naturally zero-calorie sweetener is even healthier. Food colourings of the chemical variety disable your ability to digest protein at the meal by disarming the digestive enzymes called proteases – not good news for overall health if you have them regularly. See “larder & shopping” for details of products.
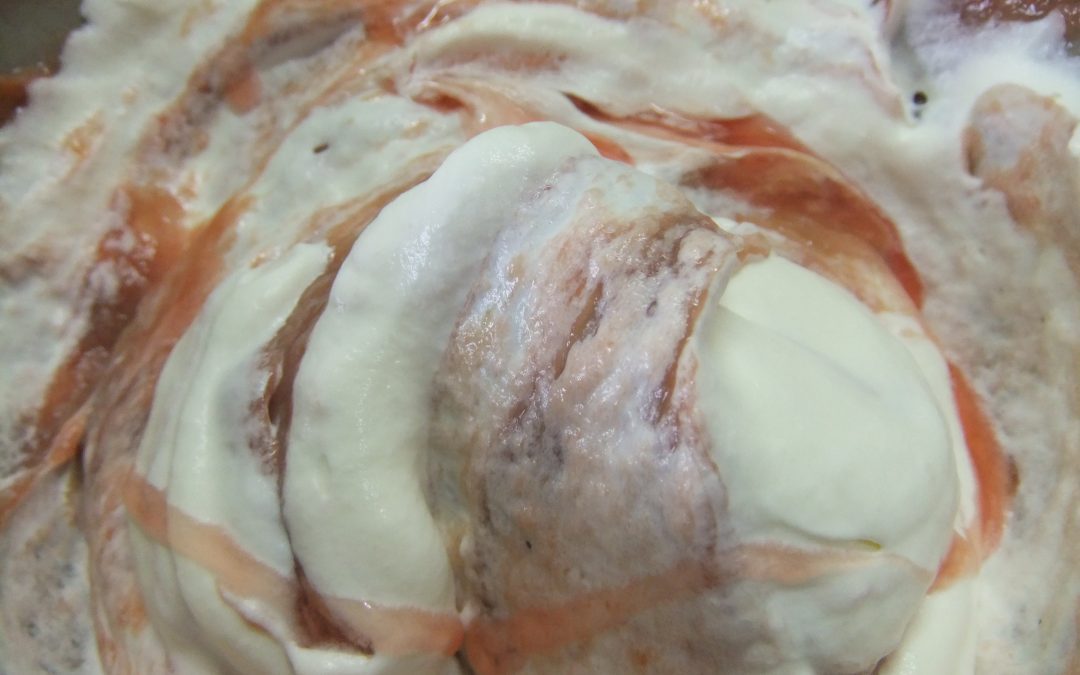
I adapted this from Nigella’s recipe which has far too much sugar. The straining of the rhubarb and boiling down of the liquid to a syrup means that when you eventually fold everything – rhubarb, cream, syrupy juice – together, you can get a lovely swirled effect. Use the rosiest, pinkest rhubarb you can find. I couldn’t get pink rhubarb so I got a pink colour by using the juice and puree from a cupful of thawed freezer raspberries instead. You can alternatively use cochineal, a natural pink food colouring, to achieve the desired effect, or not bother…
I also have a “quick rhubarb fool” recipe on this blog, as well as 2 gorgeous dairy-free versions one fancy and one quick so help yourself…
For 6
1 kg rhubarb, trimmed and coarsely sliced
4 heaped tbs xylitol or 35 drops of pure stevia*
1 tsp vanilla extract*
Optional: 1 cup frozen raspberries* thawed in a sieve over a bowl to catch the juice (if the rhubarb you have got is not the pink stuff then this helps you achieve that gorgeous pink colour but you don’t have to bother)
500ml whipping cream, ideally organic
Optional: 4 sprigs of mint to decorate
*Check out “larder and shopping” for unusual ingredients
Preheat the oven to 190C. Mix the rhubarb and the xylitol together in an ovenproof dish. Don’t add water. Cover with foil or a tight fitting lid and bake for 45-60 minutes until the fruit is completely soft. Taste for sweetness, adding a little more xylitol if needed. Allow to cool.
Meanwhile, if using raspberries set aside and keep any raspberry juice that has drained through the sieve. Then puree the berries by pushing through the sieve with the back of a spoon. Discard the seedy pulp and keep the puree.
Drain the rhubarb in a sieve and save the juice separately. In a liquidiser or food processor, puree the rhubarb with the raspberry puree if using and 1 tsp vanilla extract. If you don’t have a liquidiser, simply beat well with a wooden spoon. Chill in the fridge. Also put a large bowl (for whipping your cream) in the fridge as you get a better effect if everything is very cold.
Pour the reserved rhubarb and raspberry juice into a saucepan. Check for sweetness, adding some more xylitol if you wish, then heat and let bubble away until reduced by about half. Pour into a jug and leave to cool. Don’t refrigerate in case the juice crystallises and loses its lovely pink clarity. Puree together the rhubarb, raspberry puree if using, and 1 tsp vanilla extract until smooth.
You should now have: a pink coloured rhubarb puree and a small jug of thickened cooled syrupy juice.
Now whip your cream in the chilled bowl until its thick but not stiff. Don’t panic if you forgot to chill the bowl, its not crucial, just desirable. Carefully fold in the rhubarb puree, then some of the syrupy juice, so the mixture is streaked and marbled. Pile into 4 glasses and, if you have it, top each with a sprig of mint. Refrigerate until needed.
Why this recipe is better for you Using xylitol instead of sugar also means you are not releasing vast amounts of sugar into your bloodstream by eating this dessert. Xylitol is safe for diabetics for this reason. Amazingly, sugar is much more harmful for your heart then cream. It is not cholesterol per se, but the oxidisation of cholesterol, that damages arteries. Sugar fuels oxidation, inflammation and ageing. So if you want a healthy heart, reducing sugar is one of the keys. We now eat much less saturated fat than 50 years ago and yet heart disease has skyrocketted. Sugar also depletes the B vitamins. B vitamins folic acid, B6 and B12 are needed to keep artery-damaging homocysteine at low levels.
This is amazing!! I adapted it from Nigella’s recipe based on traditional dairy cream, which isn’t tolerated well by many dairy-sensitive people. I’ve been working for some time on a dairy-free version of cream and now I think I’ve cracked it – the result has that lovely “mouth-feel” and thickness you get from whipped cream and it’s really good for you too. The straining of the rhubarb and boiling down of the liquid to a syrup means that when you eventually fold everything – rhubarb, cream, syrupy juice – together, you can get a lovely swirled effect. Use the rosiest, pinkest rhubarb you can find. I couldn’t get pink rhubarb so I got a pink colour by mashing and straining a cupful of thawed freezer raspberries to give me 25-30ml of puree. Alternatively, use a few drops of cochineal*, a natural pink food colouring, to make the rhubarb pink. If achieving the pink colour is too much of a faff, don’t bother…
You can also see my “quick dairy-free rhubarb fool” recipe for a simplified version.
For 6
1 kg rhubarb, trimmed and coarsely sliced
4 heaped tbs xylitol*
2 teasp vanilla extract*
Optional: 1 cup frozen raspberries thawed in a sieve over a bowl to catch the juice (if the rhubarb you have got is not the pink stuff then this helps you achieve that gorgeous pink colour but you don’t have to bother) OR about 30 drops of cochineal*
400g tub Coyo plain coconut yoghurt*
400g tub natural unflavoured soya yoghurt* or almond-based yoghurt (e.g. Abbot Kinney’s0
Optional: 4 sprigs of mint to decorate
*Check out my “larder & shopping” section for where to buy all unusual ingredients
Preheat the oven to 190C. Mix the rhubarb and the xylitol together in an ovenproof dish. Don’t add water. Cover with foil or a tight fitting lid and bake for 45-60 minutes until the fruit is completely soft.
Meanwhile, if using raspberries for that lovely pink colour, set aside and keep any raspberry juice that has drained through the sieve. Then puree the berries by pushing through the sieve with the back of a spoon. Discard the seedy pulp and reserve the puree.
Drain the rhubarb in a sieve, reserving the juice. Pour the rhubarb into a liquidiser or food processor (or beat with a wooden spoon for a more rustic texture). Add the raspberry puree if using, 1 tsp vanilla extract and process or beat until smooth, adding more xylitol if needed. Chill this mixture. Put a large bowl (for whipping your Coyo and soya yoghurt) in the fridge as you get a better effect if everything is very cold.
Pour the reserved juice from rhubarb and the raspberries (if using) into a saucepan. Heat and let bubble away until reduced by about half. Pour into a jug and leave to cool. Don’t refrigerate in case the juice crystallises and loses its lovely pink clarity. You should now have: a pink coloured rhubarb puree and a small jug of thickened cooled syrupy juice.
Now empty the 400g tub of Coyo, 8 rounded tbs of natural soya yoghurt and 1 tsp vanilla extract into the chilled bowl. Whisk until it’s well mixed and lump-free. Carefully fold in the rhubarb puree, then some of the reduced juice, so the mixture is streaked and marbled. Pile into 4 glasses and, if you have some mint, place a sprig on each. Refrigerate until needed.
Why this recipe is good for you Using xylitol instead of sugar means you are not releasing vast amounts of sugar into your bloodstream by eating this dessert. Xylitol is safe for diabetics for this reason. Amazingly, sugar is much more harmful for your heart then cream. It is not cholesterol per se, but the oxidisation of cholesterol, that damages arteries. Sugar increases oxidation, ageing and inflammation. So if you want a healthy heart, reducing sugar is a major key. We now eat much less saturated fat than 50 years ago and yet heart disease has skyrocketted. Sugar also depletes the B vitamins. B vitamins folic acid, B6 and B12 are needed to keep artery-damaging homocysteine at low levels. See “larder & shopping” for details. People with cholesterol levels ABOVE the medical ideal are at hugely REDUCED risk of Alzheimers. Shocker. If you would like to read more about this send me an email via the website or give me a call.
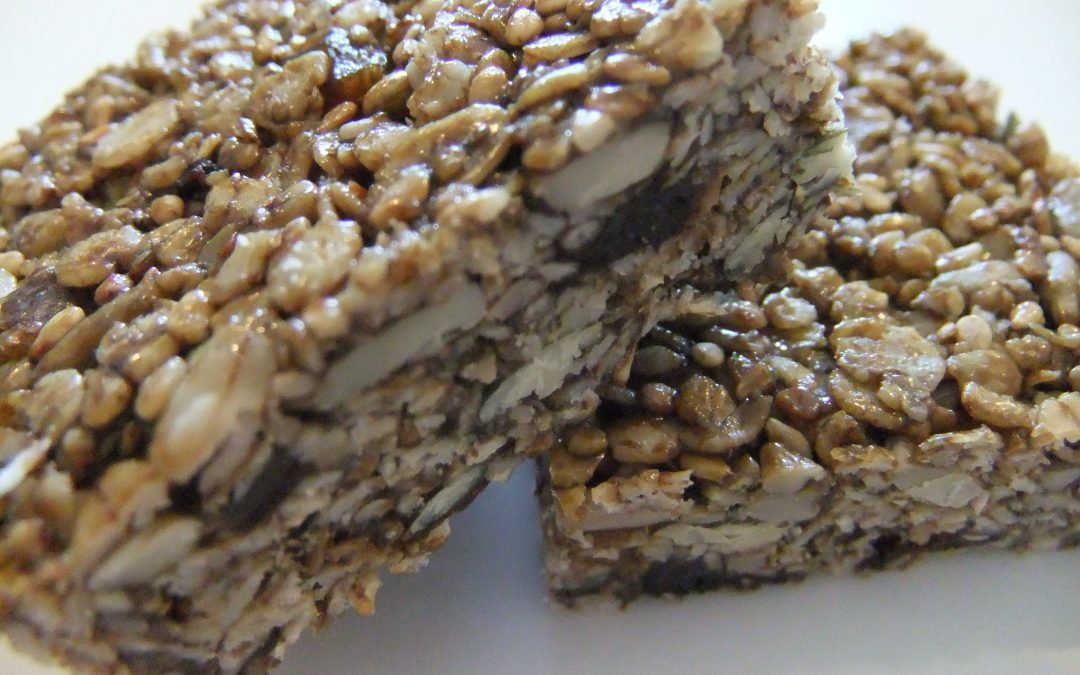
I adapted this recipe by Xanthe Clay and the result was lovely – and easy to make. They are cooked in a frying pan rather than an oven, stick together really well and have a slight crunch. Unlike “normal” sugar, molasses is unrefined so still contains many nutrients. It has a sort of toffee flavour and can be a great choice for kids as it’s high in iron. Using the sunflower and pumpkin seeds raw at the end rather than toasting them on the pan will increase the nutritional value of the bars further but there will be a bit less crunch. Use organic ingredients where possible. Delicious as a snack or lunchbox filler.
Makes 24 small squares
25g gluten-free porridge oats* (or use normal porridge oats if you can eat gluten)
85g virgin coconut oil
55g sesame seeds
55g sunflower seeds
55g pumpkin seeds
85g dried chopped unsulphured* apricots, blueberries, raisins or sultanas
85g raw cane molasses * Check out my “larder & shopping” section for where to buy all unusual ingredients
1. Line a baking tin around 27x18cm with silicone/baking paper cut to size
2. Heat a large frying pan and add the oats, sesame seeds, sunflower seeds and pumpkin seeds. Cook for about 10 minutes, stirring often at the beginning but more or less continuously toward the end to stop the mix burning. Its ready when you can hear the sesame seeds starting to pop and see the oats beginning to turn golden.
3. Tip into a ceramic or metal bowl or saucepan to cool and mix in the dried fruit.
4. Put the coconut oil with the molasses or honey in a saucepan. Heat the pan gently until the butter/coconut oil melts – do not allow to bubble.
5. Pour contents of the pan into the oat mixture. Stir until all the dry ingredients are well coated.
6. Tip the mix into the tin. Press down very firmly (it helps to put another sheet of non-stick parchment on tip). Allow to cool and then cut into 24 small squares or rectangles. Store in an airtight container for up to 10 days. After that, they tend to soften but can be firmed up by putting them on a baking sheet in the oven set to 160C and cooking for 15 minutes.
Why this is better for you: If you are starting to convert your children (or yourself) from a high sugar diet then over time you can reduce the quantity of molasses or other sweetening you use in home baking. Cravings for very sweet foods are caused by mineral and vitamin deficiencies. As these are addressed, people start to be able to taste and enjoy foods which are less sweet. Oats are a much better choice than wheat if you want to avoid upsetting blood sugar balance as oat fibre slows digestion down, keeping you fuller for longer. Nuts/seeds also help delay the release of sugars (from grains, fruit and molasses) into the bloodstream. This helps balance blood sugar levels to help energy levels, brain function and immunity. This recipe is free of harmful refined vegetable oils. Virgin coconut oil is a useful source of medium chain triglycerides , that are used by the body directly to make energy instead of being stored as fat. The oils in the sesame seeds, although damaged by heating, cannot be absorbed by the body as whole sesame seeds are not digested (they are too small so pass through and out the other end intact!). As I mentioned before, you could avoid adding the pumpkin seeds and sunflower seeds until the end to boost the nutritional value of these bars further. Raw nuts and seeds contain beneficial omega 6 oils.