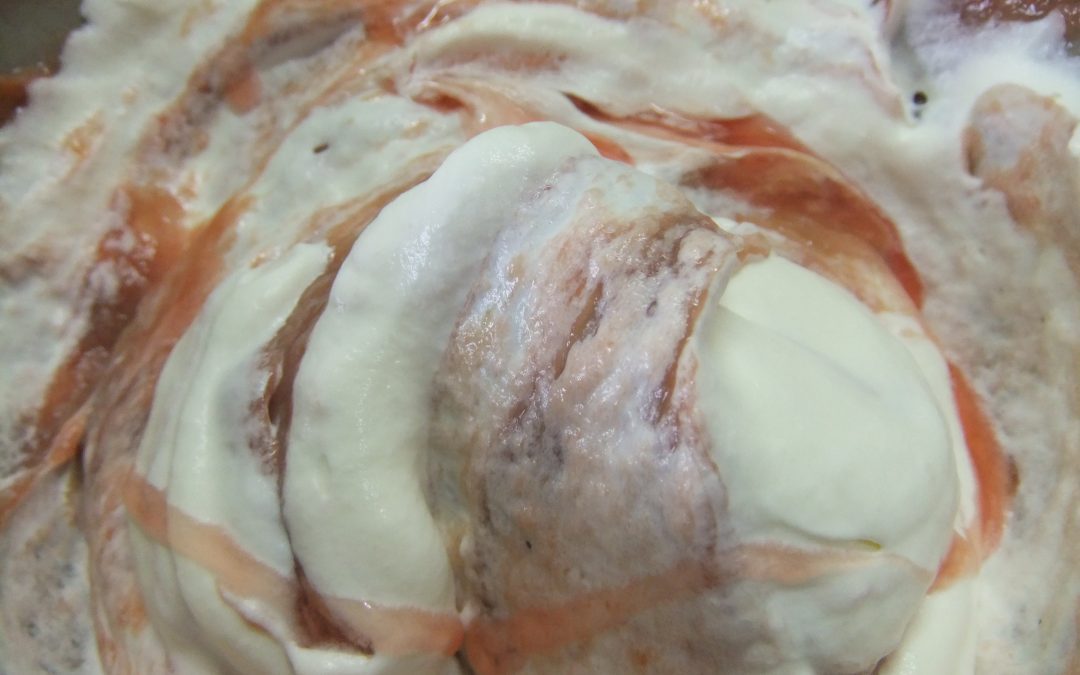
This is amazing!! I adapted it from Nigella’s recipe based on traditional dairy cream, which isn’t tolerated well by many dairy-sensitive people. I’ve been working for some time on a dairy-free version of cream and now I think I’ve cracked it – the result has that lovely “mouth-feel” and thickness you get from whipped cream and it’s really good for you too. The straining of the rhubarb and boiling down of the liquid to a syrup means that when you eventually fold everything – rhubarb, cream, syrupy juice – together, you can get a lovely swirled effect. Use the rosiest, pinkest rhubarb you can find. I couldn’t get pink rhubarb so I got a pink colour by mashing and straining a cupful of thawed freezer raspberries to give me 25-30ml of puree. Alternatively, use a few drops of cochineal*, a natural pink food colouring, to make the rhubarb pink. If achieving the pink colour is too much of a faff, don’t bother…
You can also see my “quick dairy-free rhubarb fool” recipe for a simplified version.
For 6
1 kg rhubarb, trimmed and coarsely sliced
4 heaped tbs xylitol*
2 teasp vanilla extract*
Optional: 1 cup frozen raspberries thawed in a sieve over a bowl to catch the juice (if the rhubarb you have got is not the pink stuff then this helps you achieve that gorgeous pink colour but you don’t have to bother) OR about 30 drops of cochineal*
400g tub Coyo plain coconut yoghurt*
400g tub natural unflavoured soya yoghurt* or almond-based yoghurt (e.g. Abbot Kinney’s0
Optional: 4 sprigs of mint to decorate
*Check out my “larder & shopping” section for where to buy all unusual ingredients
Preheat the oven to 190C. Mix the rhubarb and the xylitol together in an ovenproof dish. Don’t add water. Cover with foil or a tight fitting lid and bake for 45-60 minutes until the fruit is completely soft.
Meanwhile, if using raspberries for that lovely pink colour, set aside and keep any raspberry juice that has drained through the sieve. Then puree the berries by pushing through the sieve with the back of a spoon. Discard the seedy pulp and reserve the puree.
Drain the rhubarb in a sieve, reserving the juice. Pour the rhubarb into a liquidiser or food processor (or beat with a wooden spoon for a more rustic texture). Add the raspberry puree if using, 1 tsp vanilla extract and process or beat until smooth, adding more xylitol if needed. Chill this mixture. Put a large bowl (for whipping your Coyo and soya yoghurt) in the fridge as you get a better effect if everything is very cold.
Pour the reserved juice from rhubarb and the raspberries (if using) into a saucepan. Heat and let bubble away until reduced by about half. Pour into a jug and leave to cool. Don’t refrigerate in case the juice crystallises and loses its lovely pink clarity. You should now have: a pink coloured rhubarb puree and a small jug of thickened cooled syrupy juice.
Now empty the 400g tub of Coyo, 8 rounded tbs of natural soya yoghurt and 1 tsp vanilla extract into the chilled bowl. Whisk until it’s well mixed and lump-free. Carefully fold in the rhubarb puree, then some of the reduced juice, so the mixture is streaked and marbled. Pile into 4 glasses and, if you have some mint, place a sprig on each. Refrigerate until needed.
Why this recipe is good for you Using xylitol instead of sugar means you are not releasing vast amounts of sugar into your bloodstream by eating this dessert. Xylitol is safe for diabetics for this reason. Amazingly, sugar is much more harmful for your heart then cream. It is not cholesterol per se, but the oxidisation of cholesterol, that damages arteries. Sugar increases oxidation, ageing and inflammation. So if you want a healthy heart, reducing sugar is a major key. We now eat much less saturated fat than 50 years ago and yet heart disease has skyrocketted. Sugar also depletes the B vitamins. B vitamins folic acid, B6 and B12 are needed to keep artery-damaging homocysteine at low levels. See “larder & shopping” for details. People with cholesterol levels ABOVE the medical ideal are at hugely REDUCED risk of Alzheimers. Shocker. If you would like to read more about this send me an email via the website or give me a call.
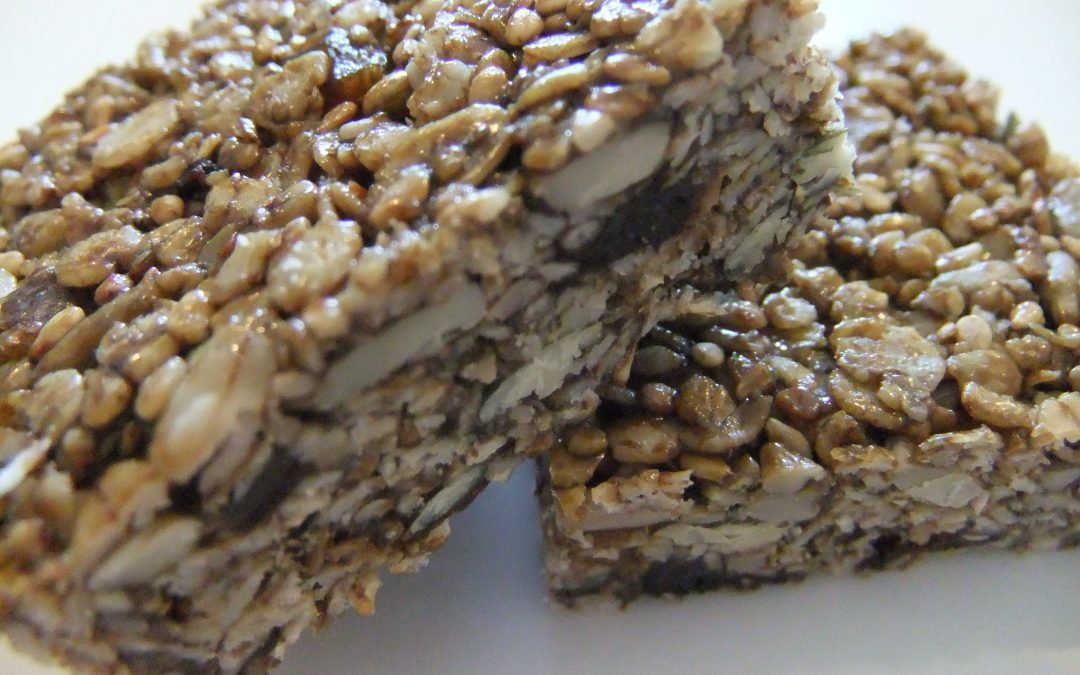
I adapted this recipe by Xanthe Clay and the result was lovely – and easy to make. They are cooked in a frying pan rather than an oven, stick together really well and have a slight crunch. Unlike “normal” sugar, molasses is unrefined so still contains many nutrients. It has a sort of toffee flavour and can be a great choice for kids as it’s high in iron. Using the sunflower and pumpkin seeds raw at the end rather than toasting them on the pan will increase the nutritional value of the bars further but there will be a bit less crunch. Use organic ingredients where possible. Delicious as a snack or lunchbox filler.
Makes 24 small squares
25g gluten-free porridge oats* (or use normal porridge oats if you can eat gluten)
85g virgin coconut oil
55g sesame seeds
55g sunflower seeds
55g pumpkin seeds
85g dried chopped unsulphured* apricots, blueberries, raisins or sultanas
85g raw cane molasses * Check out my “larder & shopping” section for where to buy all unusual ingredients
1. Line a baking tin around 27x18cm with silicone/baking paper cut to size
2. Heat a large frying pan and add the oats, sesame seeds, sunflower seeds and pumpkin seeds. Cook for about 10 minutes, stirring often at the beginning but more or less continuously toward the end to stop the mix burning. Its ready when you can hear the sesame seeds starting to pop and see the oats beginning to turn golden.
3. Tip into a ceramic or metal bowl or saucepan to cool and mix in the dried fruit.
4. Put the coconut oil with the molasses or honey in a saucepan. Heat the pan gently until the butter/coconut oil melts – do not allow to bubble.
5. Pour contents of the pan into the oat mixture. Stir until all the dry ingredients are well coated.
6. Tip the mix into the tin. Press down very firmly (it helps to put another sheet of non-stick parchment on tip). Allow to cool and then cut into 24 small squares or rectangles. Store in an airtight container for up to 10 days. After that, they tend to soften but can be firmed up by putting them on a baking sheet in the oven set to 160C and cooking for 15 minutes.
Why this is better for you: If you are starting to convert your children (or yourself) from a high sugar diet then over time you can reduce the quantity of molasses or other sweetening you use in home baking. Cravings for very sweet foods are caused by mineral and vitamin deficiencies. As these are addressed, people start to be able to taste and enjoy foods which are less sweet. Oats are a much better choice than wheat if you want to avoid upsetting blood sugar balance as oat fibre slows digestion down, keeping you fuller for longer. Nuts/seeds also help delay the release of sugars (from grains, fruit and molasses) into the bloodstream. This helps balance blood sugar levels to help energy levels, brain function and immunity. This recipe is free of harmful refined vegetable oils. Virgin coconut oil is a useful source of medium chain triglycerides , that are used by the body directly to make energy instead of being stored as fat. The oils in the sesame seeds, although damaged by heating, cannot be absorbed by the body as whole sesame seeds are not digested (they are too small so pass through and out the other end intact!). As I mentioned before, you could avoid adding the pumpkin seeds and sunflower seeds until the end to boost the nutritional value of these bars further. Raw nuts and seeds contain beneficial omega 6 oils.
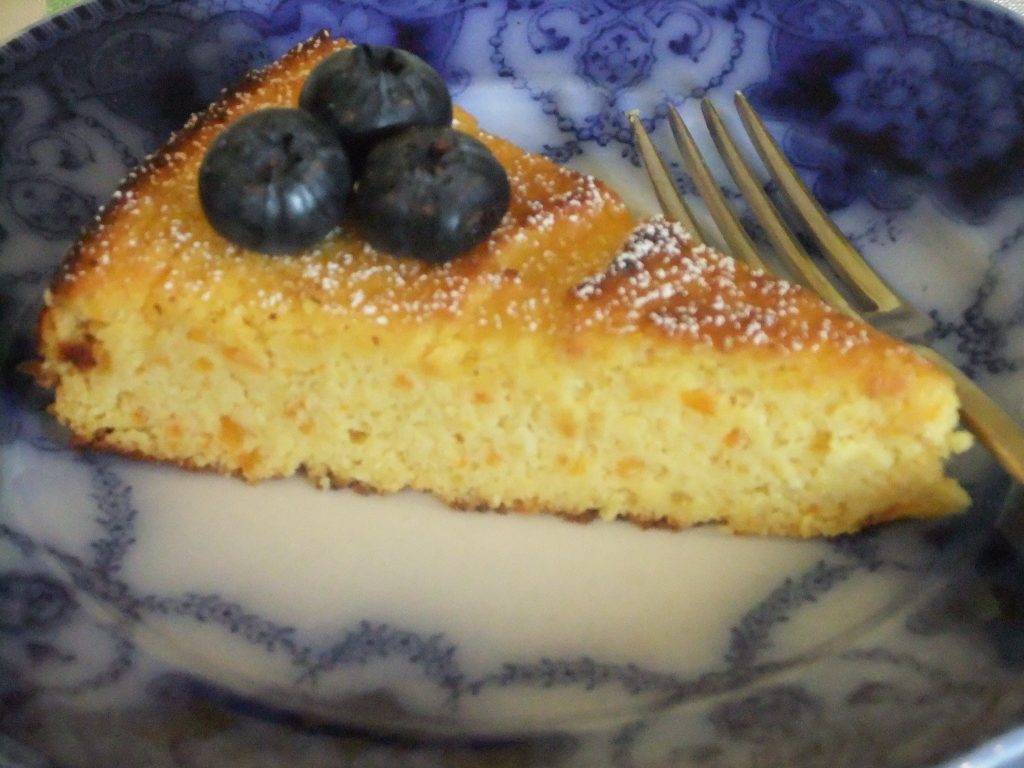
This is a pretty easy and deliciously moist cake which I made last weekend. Serve as an afternoon tea cake or as a dessert with a fresh orange and blueberry fruit salad and/or (if you eat dairy) a blob of natural Greek yoghurt.
For one 23cm round cake to serve 6-8
2 medium oranges – organic and unwaxed
3 eggs, separated
120g Xylitol
150g ground almonds
1 level tsp gluten-free, aluminum-free baking powder Check out my “larder & shopping” section for where to buy unusual ingredients
1. Place the clean, whole, and unpeeled oranges in a pan with enough water to cover. Bring to the boil, cover with a lid and simmer for about one and a half hours or until soft, adding more water if necessary (you can do this in a pressure cooker in half the time – just half cover the fruit with water).
2. Drain the oranges and cut them into quarters, discarding any major pips. Put the orange pieces, including the peel, in the food processor and blend to a pulp. Leave to cool.
3. Beat the egg yolks and the xylitol in a large bowl until light and fluffy. Beat in the orange pulp, almond, and baking powder. In a separate bowl, beat the egg whites until they form soft peaks, then gently fold into the orange mixture.
4. Preheat the oven to 175C/160 fan/gas 4. Lightly oil and line a 23cm round loose-bottomed cake tin or rectangular loaf tin with greaseproof paper.
5. Bake for an hour, until golden and firm to the touch. Turn out carefully and store in an airtight container in the fridge for up to 5 days.
Why this recipe is better for you:
Foods cooked at over 120C are less good for you than foods cooked at low temperatures. However, this cake is still better for your body than most bakery goods which contain toxic refined oils, sugar and white flour. Because the cake contains protein from the almonds, it’s low GI. This means it won’t upset blood sugar levels and cause fluctuations in energy or mood or stress levels. Xylitol is a tooth-friendly and healthier alternative to sugar. Because non-organic oranges are covered in pesticides and chemical-containing preservative waxes, their skins contain harmful chemicals. Boiling the fruit and discarding this water should make the skins safer to eat. The ground almonds in this cake do not count towards your daily intake of healthy, raw omega 6 oils as they have been heated to a high temperature and lose their beneficial properties.
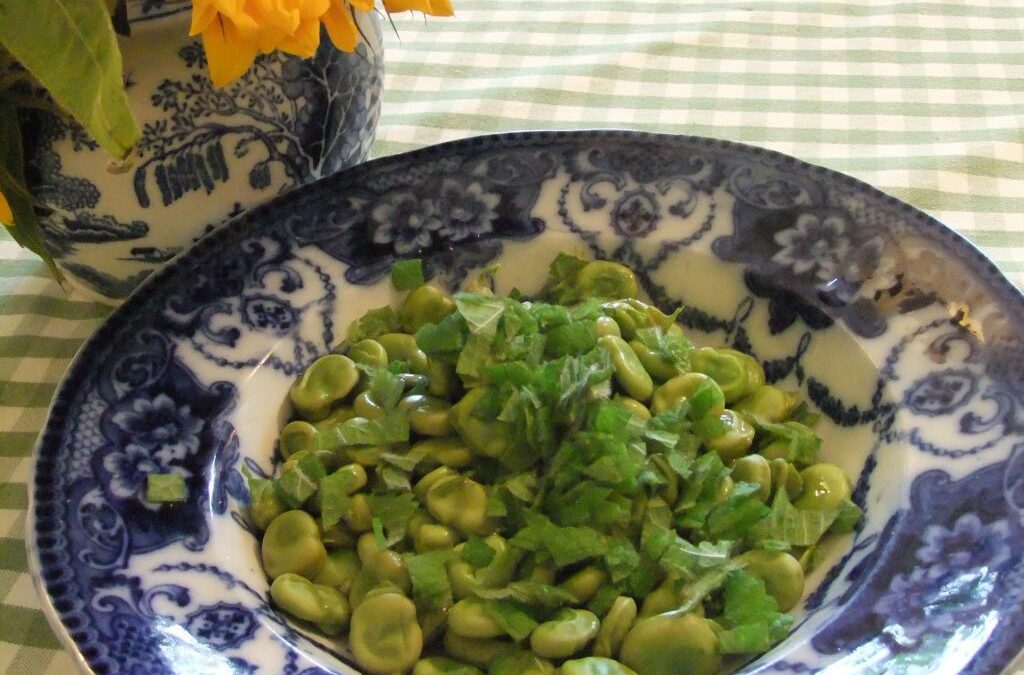
This is my recreation of a delicious little dish I once ate in a simple whitewashed cafe in Cadaques in Northern Spain. Washed down with a rustic red, it was heaven on a plate. If you want it to taste it at its most delicious slip each bean, once cooked, out of its leathery skin. The skins of large broad beans have a slightly bitter taste which most people don’t like. This is fiddly so do this when you have a bit of time, for a special meal, or at the weekend! If you are lucky enough to get baby broad beans (not much more than 1cm long), you can leave them in the skins as they are not bitter. This is the nicest eaten lukewarm, in my opinion. You can make it in advance but do allow it to come to room temperature before serving, or warm it very gently in a pan until lukewarm.
For 2 as a starter, with leftovers
1kg fresh broad beans in their pods OR 350g, frozen (see larder for stockists)
1 heaped tbsp chopped fresh mint (or more, to taste)
Extra virgin olive oil to drizzle
A pinch of Himalayan or Atlantic sea salt (see larder)
Freshly ground black pepper
If you have fresh beans, pod them. If the beans are large, steam for around 5 minutes. If they are baby beans, steam for around 3. You want them to be softened but not overcooked.
Drain the beans, and as soon as they have cooled down enough to handle. Slip each bean out of its leathery skin and place in a bowl.
Drizzle on enough extra virgin olive oil to coat the beans generously, sprinkle on a pinch of salt, and a few good grinds of black pepper.
When the beans have cooled to lukewarm, add the mint (if you add it when hot, it will turn brown, which you don’t want). Taste, and adjust the amount of mint and seasoning. Eat a small portion as a starter, or a larger one as a main with a large mixed salad and maybe some cooked millet mixed with pesto.
Why this is good for you: Beans and pulses are a rich source of soluble fibre, which helps nourish healthy bacteria in the gut. These bacteria make butyric acid that repairs the bowel and helps prevent abnormal growths. They also are important for detoxification of hormones, chemicals, and naturally-produced toxins – all good news for skin, energy levels, and healthy digestion. Beans are also rich in magnesium which helps keep you relaxed as well as supports healthy bowel function. Mint has soothing, anti-spasmodic properties in the digestive system. Extra virgin olive oil is rich in vitamin E and health-enhancing polyphenols. The Italians always say that raw olive oil gives you smooth skin and they are right. Olive oil also helps weight management and delays the effects of ageing. If you have difficulty digesting beans then this is a sign that you may need to pep up your gallbladder function or address a possible imbalance of bacteria in the gut.
This recipe serves 1 big eater and the grains in it are naturally gluten-free.
Buckwheat flakes (see “larder & shopping” for where to buy these and other unusual ingredients)
Amaranth grains
1 cup fresh or thawed mixed berries (buy frozen from most supermarkets)
1 tsp ground cinnamon
2 heaped dsp ground raw seeds (a blend of linseed, pumpkin, sesame, and sunflower is good) – see larder & shopping
Optional extras:
Sweetener if needed (stevia drops or xylitol – see larder for info)
Dairy-free milk of your choice (NB, if you are coeliac, almond milk, and unsweetened rice milk, are OK but oat milk would need to be certified gluten-free as oats are often contaminated with wheat) – see larder for where to buy dairy-free milk.
2 rounded dsp rice protein, pea protein, or (if you want to eat dairy) 1/2-1 scoop Solgar Whey to Go Vanilla – from health stores
1 dsp lecithin granules (from health stores – brilliant for those with difficulty digesting fats)
You want about 1/2 mug of mixed buckwheat and amaranth – I find 3 parts buckwheat to 1 part amaranth delicious. Empty into a saucepan with lid, cover to a depth of about 1cm with boiling water, and, if possible, soak overnight. This soaking makes the nutrients in the grains MUCH more easily absorbed by your body. Soaking for even 30 minutes makes a difference though.
Simmer for 5-10 mins, stirring occasionally and adding in more water or milk if you wish, so it doesn’t get too thick. Add half a teaspoon of cinnamon now. If using stevia drops to sweeten, add them to taste and mix well. If using a protein powder (see below) stir it in now.
Pour into a bowl and top with the berries and ground seeds and whatever other extras you choose. Variations:
Use a chopped/grated apple pear or 2 plums instead of the berries
Dietary note: Buckwheat is a rich source of a phytochemical called rutin, which helps build collagen in your body to help strengthen bones, intestines, blood vessels, and skin. Purple fruits are rich in proanthocyanidins which are profoundly anti-inflammatory – like paracetamol but longer-acting and without side effects! both amaranth and buckwheat are technically seeds rather than grains and are 100% gluten-free. Coeliacs can eat oats but only those that are certified gluten-free, that is, which are guaranteed not contaminated with gluten grains. Scientific research shows cinnamon helps regulate blood sugar levels. It is also anti-inflammatory, anti-ageing, and helps neutralise harmful bacteria in the gut. Lecithin helps emulsify fats, aiding digestion.
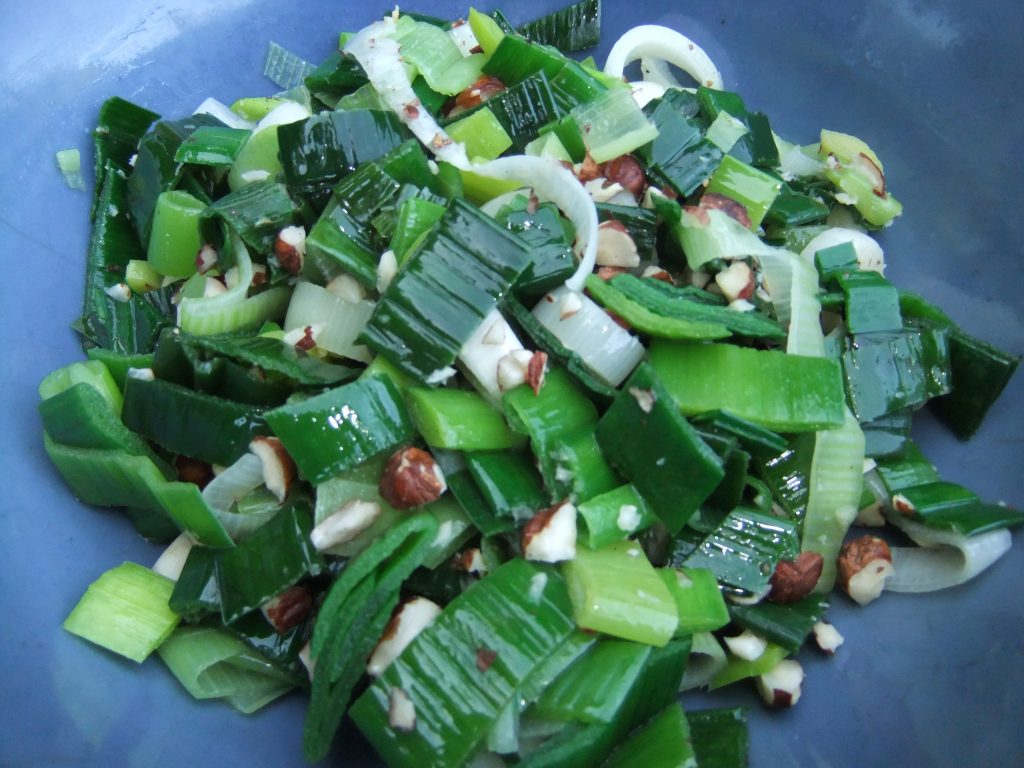
This is really simple and works hot, warm, or at room temperature, whichever you fancy. I like to eat this with grilled, poached, or baked fish. I invented this a few years ago but forgot about it until this summer’s heatwave. Good quality unrefined (i.e. cold-pressed) nut oil makes this super-delicious but if you can’t get it, extra virgin olive oil is fine – it just won’t have that nutty flavour.
For 2, as an accompaniment
2 large leeks, including the green parts
2 tbsp cold-pressed walnut or hazelnut oil (or extra virgin olive oil if you cant get nut oil)
2 tbs sherry vinegar (or red wine vinegar)
1 tbsp roughly chopped raw hazelnuts
Lots of freshly ground black pepper
A pinch of Himalayan or Atlantic Sea Salt
1. Cut the leeks in half at the point where the white meets the green part. Clean the green parts by separating the layers from each other and running under the tap to remove any grit. Wash the white parts too. Now cut everything into disks somewhere between half and three-quarters cm thick, just so long as they’re all approximately the same.
2. Steam over boiling water or in an electric steamer until wilted, checking frequently. Over boiling water, this will take maybe three minutes. You want the leeks slightly wilted but still bright green. When wilted, drain for a minute or two.
3. Empty the lot into a serving bowl, add the cold-pressed oil, vinegar, hazelnuts, and seasoning. Toss and serve.
Why this recipe is good for you: Leeks are a rich source of inulin, which helps feed the good gut bacteria that are important for all aspects of our health – skin, immunity, digestion, and more. The green parts of all vegetables are rich in relaxing nutrient magnesium too – for brain, liver, and bowel health. Cold-pressed, raw nut and seed oils are a fantastic source of omega 6 oils, which we need to balance hormones and boost immunity. A typical Western diet today contains a large amount of refined omega 6 oils (all non-raw or non-cold-pressed/extra virgin nut and seed oils are refined). Consuming a lot of omega 6 oils containing -trans fats are linked to premature ageing, life-threatening disease, hormonal imbalance, low energy, and suppressed immunity. Raw-cold pressed nut and seed oils are best kept in an airtight glass bottle in the fridge to stop them from being damaged by oxygen and light and losing their health benefits. Extra virgin olive oil is more stable and can be kept in a dark cupboard. Dressing a salad with vinegar can help boost digestion.
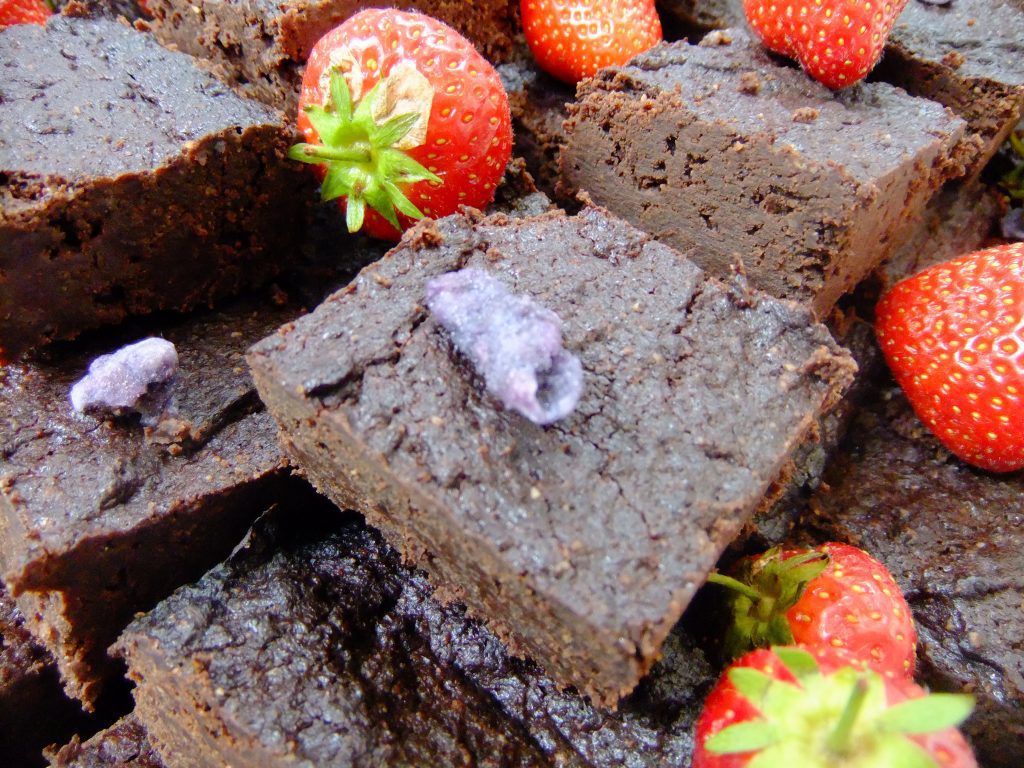
I made this decadent recipe yesterday and troughed some, warm, after dinner. I have to say, they were totally delicious. Today we chilled down a couple more in a cool box to eat after a strenuous hill walk and they went deliciously fudgy. These brownies are naturally dairy-free and, if you use gluten-free baking powder, gluten-free too. If you don’t like your cakes too sweet and use a brand of chocolate sweetened with xylitol (instead of a more bitter 80% chocolate), 100g of added xylitol is probably enough. Beetroot is naturally high in sugars so this adds extra sweetness, it also makes them moister. Pure cocoa contains theobromine, a stimulant, so don’t eat too many of these late in the evening or you could be wired all night! Buy any of the more unusual dry ingredients in health stores.
Makes one 28x18cm tray (28 very filling brownies)
250g dark chocolate (at least 70% cocoa solids, ideally 80%)
200g extra virgin coconut oil
250g beetroot, cooked (shop bought is ok – just avoid beets in vinegar!) – to cook your own, scrub, steam or boil, then peel and cool
3 large organic eggs
1 drop of vanilla extract
200g xylitol or erythritol (I reduce this to 100gas I don’t like achingly sweet stuff and the beetroot provides sugars too)
50g cocoa powder
50g brown rice flour
1 tsp gluten-free aluminum-free baking powder (or just aluminum-free baking powder if you can eat gluten)
100g ground almonds
Baking parchment/silicone baking paper plus a little more oil for greasing
28x18cm baking tray or tin (with sides 2cm or more in height)
Food processor
1. Preheat oven to 180C (165C fan)
2. Put the chocolate and coconut oil in a large bowl and place it over a pan of simmering water, making sure the water does not touch the base of the bowl. Leave to melt, then remove from the heat.
3. Puree the cooked beetroot in a food processor then add the eggs one at a time, followed by the vanilla and xylitol or erythritol. Process until smooth and increased in size.
5. Sift cocoa powder, rice flour, and baking powder into another bowl and stir in the ground almonds.
6. Stir the beetroot mixture into the melted chocolate and then fold in the dry ingredients. This looks large but it will still fit in the baking tray.
7. Use baking parchment/baking silicone paper to line the rectangular tray. Pour in the mixture and place in the preheated oven for 25-30 minutes, until just firm to the touch. It is very important not to overcook the brownies or they will be dry. A skewer inserted in the centre should come out slightly sticky. Leave to cool in the tin and then cut into 28 squares. Put in the fridge for several hours for a wonderfully fudgy effect.
Why this recipe is better for you: Beetroot is a rich source of chromium, which helps your body deal with the high level of sugar in the beet. In “normal” sugar, the nutrient chromium is removed, leaving our bodies struggling to cope with the sugar. The addition of healthy virgin coconut oil makes this recipe low GI because the fat slows the absorption of sugars into the bloodstream. This prevents blood sugar imbalance causing dips in energy and well-being. Xylitol (and also erythritol) are tooth-friendly sweetening agents that do not appear to have health dis-benefits. They are safe for diabetics too as don’t raise blood sugar levels. Coconut oil is a rich source of MCTs – medium-chain triglycerides – which the body prefers to use directly for energy production (rather than storing as fat). Many baking powders contain aluminum, often listed as a “flow agent”. Aluminium adversely affects mental function and bone density. Foods cooked above 100C are not as good for us as raw or low-temperature-cooked ones but sometimes nothing else will do than a gorgeous, unctuous choccy treat…
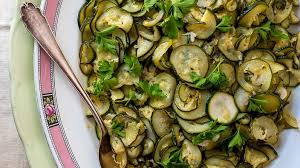
This is an Italian technique for cooking courgettes which I learned as an au-pair in Rome a few decades ago. Thanks, Signora Pilato. It’s really simple but really lovely. It goes with nearly anything.
For 2:
4 medium courgettes
Extra virgin olive oil
2 cloves garlic
Black pepper
1. Put a heavy-bottomed frying pan on medium heat to warm while you peel the garlic cloves and slice them into quarters. Throw them into the pan with about a tablespoon of olive oil to soften slightly while you prepare the courgettes.
2. Wash the courgettes, slice them into disks of say 1/2 – 3/4 cm thick. You don’t have to be too precise here – it’s a rustic dish. Throw onto the pan, turn the heat down low, stir around to coat with the garlic and oil, and cover with a lid (or large plate). The lid is important because this means the courgettes will cook in the steam, rather then (unhealthily) frying and burning. The juices from the courgettes will stop everything from burning provided the heat is low enough. Stir from time to time to check everything is cooking but not burning. If it’s getting too brown, add a tiny amount of water and turn the heat down a little.
3. After about 15-20 mins, stirring occasionally, the courgettes will be softened and start to turn a little translucent and slightly browned in places. They are now done. Take off the heat and top with a few good grinds of black pepper and maybe a little more olive oil. It will stay warm, covered, in the pan, for quite a while.
Variation:
If you are feeling fancy and don’t need to avoid dairy, you could sprinkle some freshly grated parmesan over your courgettes after piling on your plate.
Why this dish is good for you: Courgettes are a rich source of fibre and are a low-carbohydrate vegetable you can eat in unlimited quantities without gaining weight. Braising or steam-frying is a good, low-temperature way of cooking vegetables and tastes great.
Use this dressing for salads, or to drizzle over steamed vegetables to liven them up. Its also great for knocking a cold or flu on the head. If you have some left over, store in an airtight glass jar in the fridge to avoid its delicate health-giving oils from being damaged. Keeps for a week in the fridge. Tamari is a naturally gluten-free soya sauce found in Asian shops and health stores, which also stock healthy cold-pressed (or “virgin”) nut and seed oils.
Basic dressing:
4 tbs extra virgin sesame, rape or sunflower oil
1 tbs (2 dsp) apple cider vinegar, white wine vinegar or lemon juice
1 tsp tamari sauce (for SC diet substitute generous pinch Himalayan/sea salt)
1 dsp peeled, finely grated fresh root ginger
1 clove of garlic, crushed
Freshly ground black pepper to taste Optional extras (health + flavour boosters):
I finely chopped red chilli
½ teaspoon Chinese five spice powder
1 tablespoon freshly chopped coriander
1 dessertspoon sesame seeds
1. Place the basic dressing ingredients in a screw top jar.
2. Add an optional extra if using, shake well and drizzle over salad, a grilled chicken/fish fillet or steamed veg.
Why this recipe is good for you: Extra virgin (cold-pressed) raw sesame, rape and sunflower oils are a great source of unrefined omega 6 fatty acids. These delicate and easily-damaged oils are essential for digestive health, skin and hormone balance as well as energy, weight management and immunity. Damaging, toxic, “-trans fats” are created when omega 6 oils are extracted from seeds/nuts at high temperature, when they are heat-treated for longer shelf life, or when they are fried. All non virgin (non cold-pressed) nut and seed oils contain toxic trans fats and belong in the bin. Beneficial omega 6 oils are found in (raw, unsalted) hazelnuts, peanuts, sunflower and ground sesame seeds. Ginger, garlic, Chinese 5 spice and chillies are high in antioxidants that have anti-inflammatory, immune-supporting effects. Keep your precious omega 6 oils airtight in the fridge, otherwise they’ll go rancid quickly. GOOD FOOD GOES OFF! Other healthy oils include extra virgin olive, coconut, avocado which are all monounsaturated oils. This means they are not so easily damaged and so you can heat/cook them.
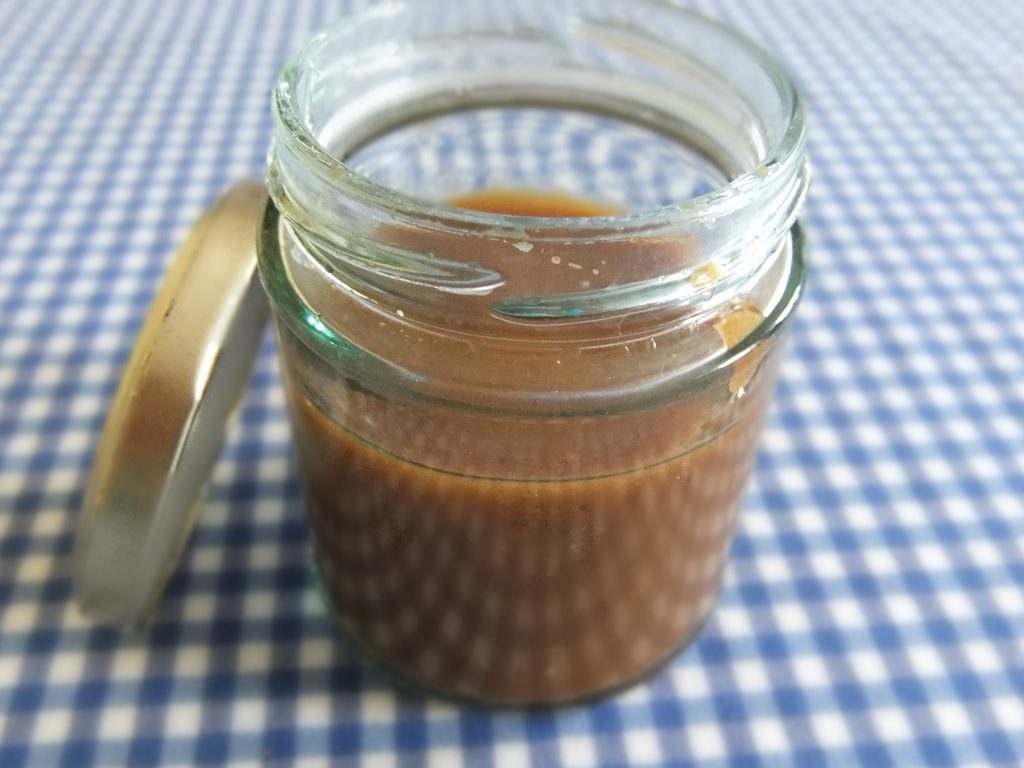
This is a dressing I eat almost every single day to make my raw lunchtime salads delicious. Vary the herb and spice flavours according to your mood. It lasts in an airtight glass jar in the fridge for at least 2 weeks. If you use balsamic vinegar, the dressing will look a rich dark brown in the jar. Pure balsamic from wholefood outlets tends to be free from caramel and other toxic colourings or E numbers often found in discount supermarket brands.
For the basic dressing:
A screw top jar, about 450ml (a standard honey jar is this size)
Extra virgin olive oil
Pure no-added-sugar balsamic or apple cider vinegar (ideally organic)
Heaped teaspoon of Dijon mustard (helps dressing mix well and is anti-inflammatory)
1 clove of garlic, crushed (optional)
Freshly ground black pepper to taste
A pinch of Himalayan or Atlantic sea salt
Heaped tsp ground sumac or paprika
Optional extras for a health/flavour boost (choose one or two):
1 tsp sun dried tomato paste or black olive tapenade
Heaped tsp dried oregano, tarragon, basil or herbes de Provence
Teaspoon finely chopped fresh rosemary
Fill the jar 1/4 full with the vinegar, add the mustard and garlic, about 10 grinds of black pepper, and one of the optional extras.
Fill to near the top with the extra virgin olive oil, put the lid on and shake well.
Why this recipe is good for you: Herbs and spices are powerhouses for health. Weight for weight they contain many hundreds of times more antioxidants than fruit and vegetables. They are powerful modulators of gut bacteria, inflammation and enhance your immune system. Allergies, Crohn’s, ulcerative colitis and arthritis are all inflammatory conditions where your immune system loses control of itself. Even bone loss is affected by your antioxidant levels and your gut bacteria. Always keep dried herbs and spices in an airtight glass jar somewhere dark and ideally not right next to heat. Heat, oxygen and light degrade the powerful health benefits of herbs and spices. Eating a wide range of herbs and spices every week is a fantastic hack for getting and staying well.
Raw, cold-pressed (ie extra virgin) olive oil has high vitamin E to reduce inflammation. Vitamin E helps recycle (prolong) the effects of vitamin C in your body to lower inflammation, enhance immunity and optimise normal healing and repair.
 is amazing!! I adapted it from Nigella’s recipe based on traditional dairy cream, which isn’t tolerated well by many dairy-sensitive people. I’ve been working for some time on a dairy-free version of cream and now I think I’ve cracked it – the result has that lovely “mouth-feel” and thickness you get from whipped cream and it’s really good for you too. The straining of the rhubarb and boiling down of the liquid to a syrup means that when you eventually fold everything – rhubarb, cream, syrupy juice – together, you can get a lovely swirled effect. Use the rosiest, pinkest rhubarb you can find. I couldn’t get pink rhubarb so I got a pink colour by mashing and straining a cupful of thawed freezer raspberries to give me 25-30ml of puree. Alternatively, use a few drops of cochineal*, a natural pink food colouring, to make the rhubarb pink. If achieving the pink colour is too much of a faff, don’t bother…