I jumped at the chance to try this recently, and (bizarrely) it’s delicious as well as having big health benefits. Although I often use turmeric in curries and my pear breakfast smoothies I was at a loss to see where I could get it in every day. Don’t miss out the black pepper, its piperine increases the bioavailability of anti-inflammatory curcumin in turmeric by 2000%! Vary the amounts of ginger and cardamom if you want. Here I give the recipe for a latte blend as well as quantities for just one cup.
DO remember to pick milks free of emulsifiers that tear the lining of your gut – in particular carageenan (E407) , carboxymethylcellulose (E466), polysorbate 80 (E433), maltodextrin (E1400). I like Ecomil brand as it’s pretty natural.
I use dairy-free milk but if you normally drink lots of cows milk with no respiratory/sensitivity issues, use your normal…
For 1 serving (see below for quantities to make up a whole jar):
200ml/1 mug of non-dairy milk of your choice (e.g. unsweetened coconut milk, almond milk)
½ level tsp (teaspoon) turmeric powder
¼ level tsp ginger powder
¼ level tsp cardamom powder
Pinch freshly fine ground black pepper (if you leave it too coarse it just stays in bottom of the mug)
Optional: Small pinch of cayenne/chilli powder
To sweeten: a few drops of stevia or half a teaspoon of xylitol/raw honey
Heat the milk on the stove or with the electric steam milk frother on your coffee machine.
Add the spices and sweetening of your choice, whisk to mix.Variation: If you are feeling decadent, a sprinkle of Ceylon (Sri Lankan) cinnamon on top of the latte is lovely and boost vitality even more.
Turmeric latte blend (approx. 30 servings) Keep this in a glass jar with a tight-fitting lid in a dark place to keep potency and flavour.
Why this is great for you
Turmeric reduces inflammation everywhere in your digestive system. A study using 1g turmeric powder twice a day resulted in a massive improvement in remission rates in inflammatory bowel disease. 1 gram is just half a teaspoon. Turmeric is also well-studied in relieving gastritis and gastric reflux and keeping your brain healthy. What’s not to like? Ginger, like turmeric, supports your liver function to help skin, energy, bright eyes and skin. And it helps reduce nausea. Chilli powder helps thicken the mucous linings of your stomach and intestines. Chilli is used successfully in Ayurvedic medicine to heal stomach ulcers and gastritis! Its usually not the spices in “spicey food” that make people feel bad – it’s the large amounts of toxic, cheap refined oils your average Indian takeaway or restaurant uses in the cooking. Ceylon/Sri Lankan cinnamon (not “cinnamon” from supermarkets, which is in fact the cheaper cassia) has remarkable health effects. Like ginger, it can help prevent diabetes (or tackle it) but it also reduces “bad” bacteria and yeast (candida) overgrowth in your gut. Most spices have a selective effect on your gut bacteria – helping encourage growth of “good guys” and inhibiting disease-causing ones. Helpful bacteria in your gut make natural anti-bacterial and ant-viral substances like interferon gamma which travel to wherever you have an infections and help see it off.
This would be a great drink for someone with a cold or flu as it’s anti-viral and anti-inflammatory.
This pastry with its rich butteryness will give you an “I can’t believe it’s not normal pastry” moment. This pastry works brilliantly for an apple tart, a steak and kidney pie or your Christmas mince pies. The original recipe ( by Elizabeth Barbone on seriouseats.com) used sorghum flour which gives the best texture. I’m using this to make mince pies this year and instead of a pastry lid will sprinkle on my (Gluten-free) Crumble topping for mince pies (also on this blog).
Makes 1 large 28cm tart (with pastry base and lid) or two tart bases or steak and kidney pie tops (for a pie to serve 4). The pie in the picture has myself and my husband’s initials on it (in case you were wondering).
75g millet flour
75g sorghum flour (if you can’t get this use brown rice flour)
55g oat flour (I make this by blitzing gluten-free oats in my coffee grinder or mini food processor)
1 rounded teaspoon xanthan gum
225g butter, cut into small pieces
2 tablespoons xylitol (only if you want a sweet crust – personally I don’t like sweet pastry)
3 to 8 tablespoons water
A little flour for rolling out: white rice flour or tapioca flour work well, or use a commercial gluten-free flour blend.
Food processor method:
In the bowl of a food processor, combine dry ingredients. Pulse to combine. Add butter. Pulse to combine. No large pieces of butter should remain. This takes about ten short pulses. Transfer mixture to large mixing bowl. Add 3 tablespoons water and stir, using a wooden spoon. If mixture is dry, add more water, one tablespoon at a time.
By hand method:
Whisk together dry ingredients in large bowl. Add butter. Using either your hands or a pastry cutter, cut butter into flour mixture until no large pieces of butter remain. Add 3 tablespoons water and stir, using a wooden spoon. If mixture is dry, add more water, one tablespoon at a time.
To make a tart or pie base or lid:
Divide dough in half and wrap with plastic wrap. Chill for one hour. Remove crust from the refrigerator and allow to come to almost room temperature. Cut two pieces of parchment 12 by 18-inches. Lightly flour one piece of parchment, silicon or greaseproof paper with white rice flour. Center the dough on the paper. Generously flour the top of the dough. Roll dough into a large circle, about 11-inches. Invert the pie plate over the dough. Slide your hand between the counter and the parchment paper. Place your other hand on the bottom of the pie pan. In one quick motion, flip the dough and pan over. Press dough into the pan. Carefully pull the paper off the dough. If any of the dough rips apart, press it back together. Trim edges, crimp if desired. For a double crust pie, repeat process. Quickly flip rolled out dough onto the top of filled pie or roll dough around the rolling pin and transfer it to the top of the pie. Bake pie at the time and temperature the pie recipe directs.
Unlike normal delicious pastry, this uses all wholegrains so is packed with minerals and vitamins. If you want lots of energy and vitality, keep grains and other starchy carbs (eg potatoes) to no more than 25% of your lunch and dinner. Half your plate will be non-starchy veg if you want lots of energy, clear skin and a slim shape. Because of the huge amount of butter, this pastry is intended as a treat, not a daily staple.
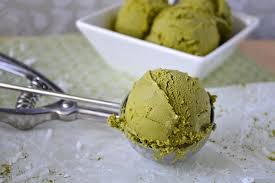
This is gorgeous, creamy and dead simple to make. You won’t miss the cream in this dairy free recipe. I adapted the recipe from the minimalist baker blog as I thought the original had an overpowering amount of macha (which is also very costly!).
Makes 800ml (serves 8)
1 tin full fat coconut milk (400ml), ideally chilled, industrial additive free if possible*
230ml unsweetened almond milk fortified with calcium, ideally chilled
50g Medjool dates (if you don’t have these, then you can soak normal pitted dates overnight in filtered water – soaking means you don’t get ice cream with “bits”)
2 rounded teaspoon macha tea (green tea powder from health stores)
3 rounded teaspoons raw honey
¼ teaspoon xanthan gum
1. Blitz the first 6 ingredients (i.e. everything except the xanthan gum) until smooth. Taste and adjust the amount of macha, honey or dates as needed.
2. Add the xanthan gum and blitz again to mix.
3. Chill for an hour or so in the fridge (if you have already chilled everything before starting then around half an hour will do).
4. If using the ice cream maker, churn according to manufacturer’s instructions. This takes around half an hour. If you don’t have an ice cream maker, pour the mix into a freezer-safe container, cover, freeze and whisk every hour or so to aerate.
The ice cream keeps its’ flavour for a week or so in the freezer.
To serve:
Take it out of the freezer for 20-30 mins to soften. Keep your ice cream scoop in a jug of hot water to get perfect scoop shapes.
Try serving with a salad of pears, mangosteen or lychees and maybe some cocao nibs.
Why this is better for you: If you can, buy the tinned coconut milk that’s organic – it tends to be free of the industrial emulsifiers which damage your gut (e.g. polysorbate 80, carageenan, maltodextrin, carboxymethylcellulose). Organic brands tend to be packed in tinsnot lined with BPA, the hormone disrupting ingredient in many plastics that leeches into food. This ice cream is made without refined sugar so it’s a lot easier on your body than “normal” ice cream whose sugar depletes your body’s essential nutrients. That said, it’s not something to eat every day because it’s still got a lot of natural sugars in from the dates and honey. Macha (a type of ground up green tea powder) is a great source of catechins, the magical substances in green tea that help foster growth of beneficial bacteria in your gut, dampen down inflammation anywhere in your body, boost your ability to stay youthful and healthy and maintain cognitive function as you age. The ice cream happens to be dairy-free, which is great if your dairy sensitivity causes problems for your skin, breathing issues, sinuses or energy levels like it does for so many. Thick coconut milk is a rich source of energy-giving medium chain triglycerides. these are a special type of fat that is easy to digest and provides energy straight to your brain and muscles.
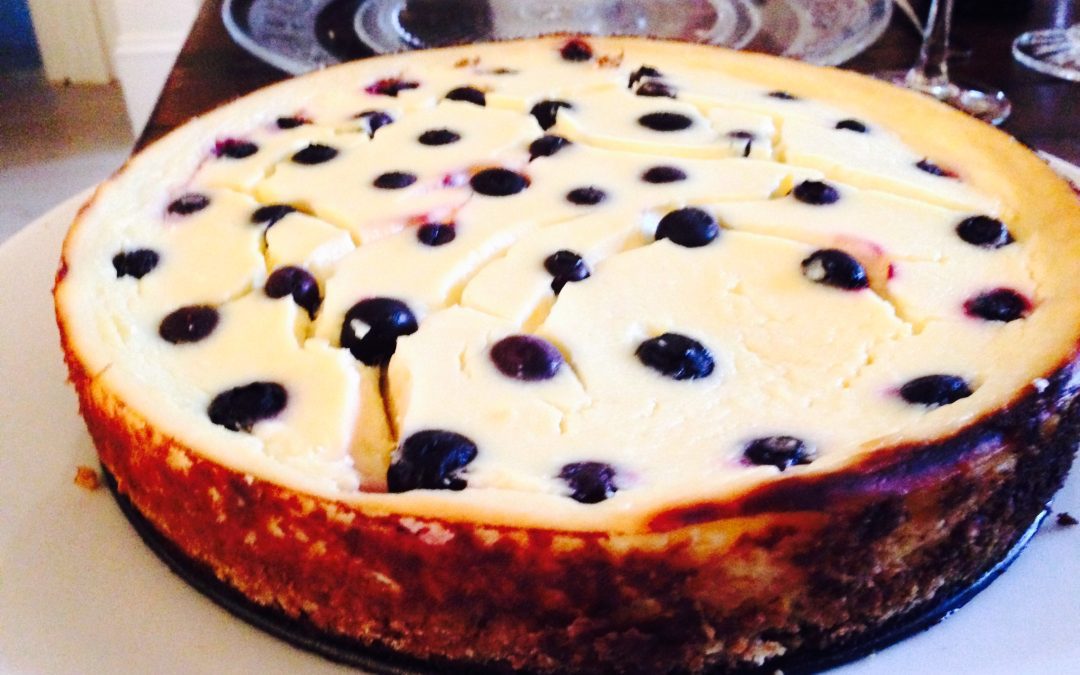
I got this lovely recipe from Linda McFarland. Everyone loves it and no-one notices it’s healthier than standard sugar-laden gluten-laden cheesecake.
Serves 8
For the base:
50g virgin coconut oil
170g Nairns gluten-free unsweetened oatcakes (you can use normall 100% oat rough oatcakes if you are not gluten-sensitive/coeliac)
35g xylitol or (even better) erythritol
1 rounded tsp ground ginger
¼ level tsp Himalayan/Atlantic sea salt
For the cheesecake topping
3 lemons, organic or washed well with hot soapy water and rinsed
250g tub ricotta cheese
200g Greek yoghurt (sheep/goat)
4 eggs, ideally organic
1 tbs cornflour
70g xylitol
1 punnet fresh blueberries
1 x 23cm/9in round springform cake tin
1. Preheat oven to 175C/160C fan.
2. Melt the oil or butter gently in a saucepan and while this is happening crush the oatcakes to small crumbs.
3. When butter/oil is melted, add crushed oatcakes, xylitol, the ginger and salt and mix well.
4. Press in to the bottom of the tin and chill in the fridge.
5. Next, zest and juice the 3 lemons into a large bowl, mix in the ricotta cheese, the yoghurt, eggs, cornflour and 70g xylitol and whisk well until smooth. The mixture will be quite thin.
6. Pour the mixture into the tin, sprinkle the blueberries over (they will float on the top) and bake for around 40 minutes until firm.
Cool and run a knife around the inside of the tin before releasing. Serve with a berries on the side.
Why this is better for you: This recipe uses xylitol or erythritol instead of sugar. Xylitol is a health shop sweetener that looks and tastes like white sugar but doesn’t rob your body of nutrients. It is safe for diabetics and doesn’t cause weight gain either. This is because it doesn’t affect your blood sugar levels. Because the base is made with oatcakes instead of the normal wheat biscuits it is much kinder to your digestive system (even if you are not sensitive to gluten). The insoluble fibre in wheat is an intestinal irritant. Virgin coconut oil is a good source of medium chain triglycerides which are helpful for boosting energy and are really easy to digest. Lots of people are sensitive to dairy (milk) products. This recipe uses goat/sheep yoghurt and ricotta so it is lower in milk allergens like casein, which cause problems for so many people. Lemon zest and juice helps detoxification – just the thing if you have had a rich meal and a few too many glasses of wine….
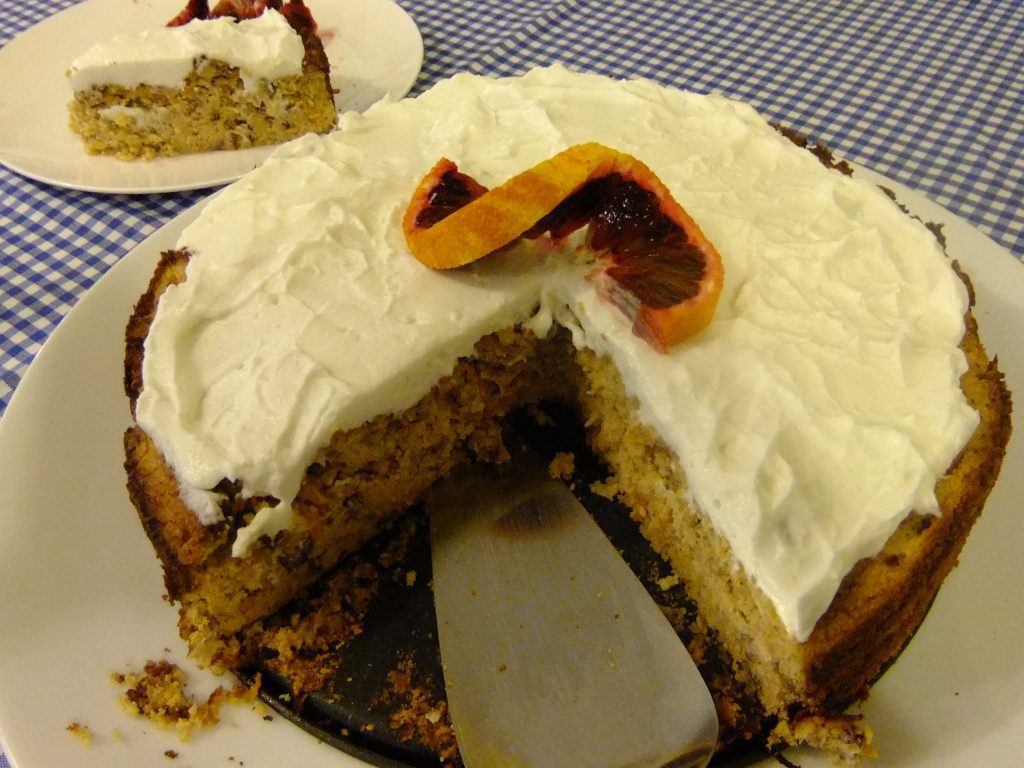
I have to admit I was dubious about making this cake because it contains no grains. I couldn’t believe it could be as nice as the wheaty carrot cake I used to make before I learned I was coeliac. But this one is lovely and moist and not as fiddly to make. The icing is phenomenal whether you go for the dairy-free or the dairy-laden option. I’ve adapted the recipe slightly from the one on “Wheat Belly” by cardiologist William Davis. He writes about why humans are totally unsuited to eating gluten and how you can enhance your health by cutting grains. The original recipe uses double the sweetener for the cake, but I found that a bit sickly. If you (or your kids) have a massive sweet tooth though, feel free to double it…
For 10 generous servings:
Cake:
125g coconut flour
90g xylitol or erythritol
2 tbs grated orange zest*
1 rounded tbs ground flaxseeds
2 rounded tsp ground cinnamon
1 rounded tsp ground allspice
1 rounded tsp grated/ground nutmeg
1 rounded tsp gluten-free baking powder (this is usually free of toxic additives)
Pinch Himalayan salt/Atlantic sea salt
4 large eggs, organic if possible
105g coconut oil, gently melted
200ml natural soya yoghurt, natural yoghurt or kefir
100ml full fat coconut milk (tinned is fine)
2 tsp pure vanilla extract (not “essence” unless you are happy to eat gluten)
160g (2 cups) finely grated carrots
110g pecans, chopped (or use walnuts)
23-25cm circular or square springform baking tin
Electric cake mixer or whisk
Icing (vegan or standard cheese base):
1 tbs lemon juice or home made kefir
1 tbs xylitol/erythritol (or more, to taste, if you want it sweeter)
200g plain Coyo (dairy-free yoghurt) for dairy-free/paleo diets OR ricotta cheese if you want to eat dairy
Alternative kefir cheese icing (kefir is tolerated by most dairy-sensitive people):
200g kefir cheese (made by straining kefir through muslin/nut milk bag to remove the watery “whey”)
2 tbs xylitol
Optional: zest of a lemon
*If you don’t use organic oranges, there will be pesticide residues on the peel. So put your oranges into a litre of water, add 2 tbs vinegar and leave for at least 20 minutes before scrubbing well (to remove the chemicals). This trick also works for cleaning vegetables (leafy greens can just be soaked and washed off after).
1. Preheat oven to 170C (155C fan) and grease the baking tin with coconut oil.
2. To make the cake: combine the coconut flour, erythritol, xylitol, orange zest, ground flaxseed, cinnamon, allspice, nutmeg, baking powder and salt in a large bowl and mix by hand.
3. Beat together the eggs, gently melted (just hand hot) coconut oil, yoghurt or kefir, coconut milk and vanilla in a medium bowl. Pour the egg mixture into the coconut flour mixture. Using an electric mixer, beat until thoroughly mixed. Stir in the carrots and pecans by hand. Pour the mixture into the baking tin.
4. Bake for around 1 hour checking after 45 mins. When a toothpick/skewer inserted into the cake comes out clean it’s done. You want the cake to remain moist. Much better slightly undercooked than over, I promise!
5. To make the icing: combine the Coyo or ricotta with the lemon juice and xylitol in a bowl and beat until smooth. If you’re making the kefir cheese based icing omit the lemon juice and optionally add the zest of a lemon.
6. Spread the icing over the top of the cooled cake.
Why this cake is better for you: As you probably know any food that’s cooked above 100c generates toxic by-products (though less so if you don’t use sugar or polyunsaturated oils). That’s why a raw or just gently cooked diet (nothing above 100c) helps keep you younger longer, lowers inflammation and generally helps your body. That said, who doesn’t occasionally want something like a cake? This one is ideal as it’s grain free and protein rich. This means it doesn’t cause the fluctuations in blood sugar that fuel inflammation and can trigger skin issues, fatigue or dips in brain function. Coconut, unlike most oils, is still good for you even when it’s been heated. Roll on full-fat coconut milk! The low fat stuff is filled with emulsifiers and lacks the good stuff. Xylitol is what’s called a sugar alcohol and is 1.6 times as sweet as sugar but with half the calories. It’s not absorbed by your body so it doesn’t affect blood sugar levels. It’s generally deemed to be safe. If you have a very sensitive bowel, go cautiously with xylitol because it can be hard for some people to deal with in large quantities. Guideline: just a slice, and not the whole cake in one sitting! If you use Coyo yoghurt (or kefir) in the icing, you will also be getting a boost of friendly bacteria in this delicious cake to boost vitality and wellbeing.
Gluten-free pancakes with apple and vanilla yoghurt
These are my “traditional” but gluten-free pancakes and I love them for an occasional treat. They come out pretty similar to traditional wheaty pancakes and we think they are just as nice. I plan to eat these for dessert on Pancake Tuesday with freshly stewed cooking apple (sweetened with pure stevia or xylitol) and a large dollop of Greek yoghurt, natural yoghurt or Coyo coconut yoghurt. Coyo sometimes needs to be thinned thinned with a little non dairy milk when its extremely thick. Of course there’s always the more traditional option to eat them with lashings of lemon juice and a sprinkle of xylitol. Delicious!
For best results make the batter between 2 hours and 2 days before and store in the fridge until ready to use.
110g plus 1 tbs brown rice flour, organic if possible
35g soya flour
½ level tsp Atlantic sea salt or Himalayan (pink) salt
2 eggs
1 tbs virgin macadamia oil or light olive oil
250ml dairy or non-dairy milk of your choice (additive-free unsweetened almond or coconut milk are particularly good)
Virgin coconut oil for cooking
1. Combine all the ingredients and whisk thoroughly with an egg beater or electric mixer or in a blender. the batter should flow like double cream. If it is too thick or thin, adjust with either rice flour or water. Store in the fridge until ready to use.
2. Heat a frying pan over a medium-high heat. too low a temperature will produce tough crepes, too high will burn them before they are cooked. Add a knob of coconut oil (about the size of the top part of your thumb) to the pan before cooking each crepe.
3. Pour the batter (about an eight per crepe) into the hot frying pan, tilting the pan to distribute batter evenly and thinly. Pour out any excess.
4. Cook until the top appears dry, about 1 minute. Lift with edge of a heatproof spatula and if the bottom is golden, easy the whole crepe up with the spatula and turn. cook about 1 minute more. Crepes can be stacked and kept warm in a low oven.
Why these are better for you: The soya flour and eggs in these is high in protein, so you are less likely to have a blood sugar rush and crash after these, even if you eat them on their own. Erratic blood sugar plays a massive part in skin problems, accelerated ageing process, stress and digestive issues.
Unfermented soya products like soya flour (and soya milk) are not an especially healthy option to eat every day because they bind (stick to) essential minerals, making it hard for your body to digest them. That’s why I recommend these pancakes for occasional treats rather than every day. In contrast to soya flour and soya milk, fermented soya products are beneficial and can help reduce the hormonal imbalances that lead to breast and prostate issues. Examples of fermented soya products are miso, tempeh and soya yoghurt. So best keep soya flour and soya milk for occasional treats. Coconut oil is fantastic for your brain, your skin and even your digestive system. Unlike many oils, it is not made harmful by normal domestic cooking heat.
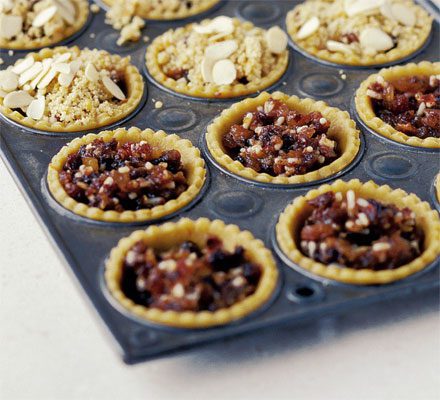
I got this idea for a crumble topping from Domini Kemp and adapted it to be less tooth-achingly sweet and gluten & dairy-free. I love this decadent topping because it means you don’t have the time-consuming fiddly task of sticking pastry tops onto your mince pies (a real pain if you are making a large batch). You can make this topping in advance and store in the fridge in an airtight jar for a week or two.
This also makes a gorgeous topping for any sort of fruit crumble if you mix it 60:40 with gluten-free oatflakes.
To top 16 mince pies
Pinch of Ceylon cinnamon
25g virgin coconut oil (or butter, if you want dairy)
12g xylitol
25g brown rice flour
25g ground almonds
25g flaked almonds
1. If you have a food processor but the ingredients except the flaked almonds in a food processor and blitz until it resembles breadcrumbs. Empty into another bowl and stir in the almonds.
If you don’t have a food processor, rub the ingredients together (except for the flaked almonds) by hand then stir in the flaked almonds.
2. Divide between 16 mince pies and bake at 180C fan/195C until brown. Cool in the tins for 5 minutes.
Why these are better for you: Because these pies don’t contain refined sugar (if you use my mincemeat recipe) they don’t immediately start to drain your body of nutrients like magnesium (for mood) or selenium (needed for fat-burning thyroid hormones). The nuts, although cooked (and therefore no longer containing much in the way of healthy oils!) do contain protein, which helps prevent the dips and peaks in blood sugar that can make you feel tired or narky. Coconut oil is not damaged by baking so its still healthy in the finished product. The medium chain triglycerides in coconut oil are useful for energy levels as they are used directly by your body instead of being stored as fat in your cells. Virgin coconut oil rules!! Ceylon cinnamon (but not normal cassia cinnamon sold as “cinnamon”) helps your body regulate blood sugar. This helps reduce the risk of peaks and troughs in energy, brain function and mood throughout the day. It also helps reduce likelihood of developing diabetes.
We drank this out of a flask today after a winter woodland walk when we were all frozen. I concocted it a few years ago so drivers and other non-drinkers got something interesting to drink at our mulled wine and mince pie night. It has the tanginess and colour of mulled wine and all the lovely spiceyness of cinnamon, cloves and nutmeg. If you like you can make this a day or two ahead of time and cool covered with a lid so the lovely aromas don’t disappear…
For 4 big glasses:
3 good quality hibiscus tea bags (try to buy from health stores because they taste better). If the teabags have other flavours such as lemon, ginger, cinnamon, cloves, star anise in as well that’s fine) (see below for alternatives to teabags)
750ml boiling water
3 long strips of orange peel (use a potato peeler to do this) from 1 orange
Juice of 1 orange (take the strips of peel off first as its harder to do after juicing)
12 whole cloves
10cm cinnamon stick
A good grating of whole nutmeg (or a large pinch of ground nutmeg but this makes the drink look more cloudy)
2 tbs xylitol (from health stores), or to taste For more info on unusual ingredients, see my larder & shopping section
1. Boil the kettle, then in a saucepan pour 750 ml boiling water over the 3 teabags. Add the orange peel, whole cloves, cinnamon stick, nutmeg and xylitol.
2. Leave to infuse on a very low heat, covered with a lid or plate, for around 15 minutes. Meanwhile, juice the orange, strain it and discard the “bits”.
3. When all the flavours have infused well in to the liquid, fish out the teabags and add the juice of the orange. Adjust the sweetness, adding more xylitol if it’s not sweet enough already.
4. When you are ready to drink it, heat through and pour into glasses.
Variations:
Try adding extra zestiness by adding fresh ginger tea. Infuse a heaped teaspoon of finely grated fresh ginger in half a cup (around 125ml) of boiling water, then strain the liquid into your mulled non-wine. Or simply thinly slice 3cm of fresh ginger root into the saucepan before you add the 750ml boiling water.
You could use Biona unsweetened cranberry juice (I suggest around 100ml) instead of hibiscus teabags. The cranberry also gives the tart flavour you need for the mulled non-wine. Biona brand is in health stores and Dublin Food Co Op.
Instead of whole cinnamon and cloves you could use ground but remember this will make the drink cloudy.
Why this is better for you: Because this recipe uses xylitol instead of sugar, and hibiscus instead of wine, its a really low GI (or low sugar) drink. This means it doesn’t rob your body of nutrients like sugar or sugary alcaholic drinks (eg wine) do. Spices (ginger, nutmeg, cloves, cinnamon and more) are a powerhouse for your wellbeing because they are anti-microbial, acting like natural antibiotics without the downside of antibiotics. Spices help you resist getting colds, flu and skin infections (e.g. acne), so they are a brilliant thing to eat or drink every day.
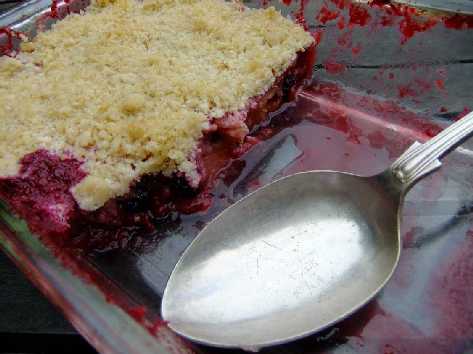
The most gorgeous crumble I ever ate was made by my flatmate John from a glut of Victoria plums in the front garden. This jewel-red crumble from apples and berries reminds me of it. Use apples and blackberries, raspberries or even blackcurrants, or apples on their own, or plums. If you use plums it’s a good idea to quarter them and take out the stones before cooking. Just make sure you have around 1000g of fruit in total – it doesn’t have to be exact though. Remember to taste the fruit mix as soon as it has softened in the pan, adding more sweetening if you need to. Here I have used 900g apple and 100g of blackberries.
For 6 servings:
Fruit mix
1kg cooking apples (or add some red fruits and reduce the amounts of apple)
4 tbs water
Sweetening to taste: I use 30 drops of stevia or a couple of tablespoons of xylitol/erythritol (health shops)
140g blackberries (about a mugful) thawed or fresh
Crumble topping
30g virgin coconut oil, ghee, avocado oil (or, if you eat dairy, normal butter, organic if possible)
100g ground almonds
100g gluten-free oat flour (make by whizzing GF oats in your food processor) or use normal oats if you have no problem with oats
1 heaped tbs xylitol or erythritol (or a little more to taste, if you like)
A little extra oil for greasing
Pyrex/ovenproof dish/small roasting pan (I use one 17 x 27 x 6cm high and the quantities work well.
1. Preheat oven to 170c.
2. Prepare the apples by washing, peeling and slicing. Grease your dish with whatever sort of oil you are using. Layer the apples and blackberries in your dish, sprinkling over some xylitol/erythritol on each layer until all the sweetening is used up. If you are using stevia drops instead, put them in about 3 tbs of water and use this to sprinkle over the layers until everything is used up.
4. In a bowl or food processor mix the oat flour, ground almonds and xylitol/erythritol. Rub in or process the coconut oil, ghee or butter or mix in the avocado oil until the whole thing looks a bit like breadcrumbs.
5. Pour the fruit mix into the dish, spread the topping over evenly, and bake in the oven until the top is lightly browned, about 30 minutes.
Why this is better for you: Cooked apples are a rich source of pectin, a type of prebiotic fibre that feeds your beneficial gut bacteria so critical for your immune system (and your whole body). Prebiotic fibre in oats, berries and plums also feeds good bugs. If your weekly eating contains many different types of plants, herbs and spices you will be working wonders for your gut bacteria and your health. Different beneficial bacteria need different plant fibres.
The crumble topping in this dessert is gluten-free. Gluten is difficult for anybody to digest, not just people with gluten-intolerance or coeliac disease. Gluten grains, especially wheat, are also high in phytates. Phytates are natural plant substances that inhibit you from absorbing important minerals in your diet (e.g. zinc, needed for efficient immunity).
If you are dairy-intolerant, you can still enjoy dairy in the form of ghee (clarified butter). This is where the butter is heated until it seperates. The milky white liquid on the bottom, underneath the pure butter fat, is discarded. This gets rid of the casein (dairy protein) that is a problem for people with dairy intolerances. Avocado oil is also a good choice for crumbles as it isn’t converted by the heat of the oven into a toxic fat. Avocado oil and olive oil are monounsaturated fats so much less damaged by heat then nut/seed oils like rape, sunflower or vegetable oil.
Virgin coconut oil iis also good as it contains capryllic acid and medium chain triglycerides. Capryllic acid helps inhibit overgrowth of disease-causing yeasts/candida in your gut. Medium chain triglycerides are a good source of energy which are easily digested and are burnt for energy rather than being converted into body fat.
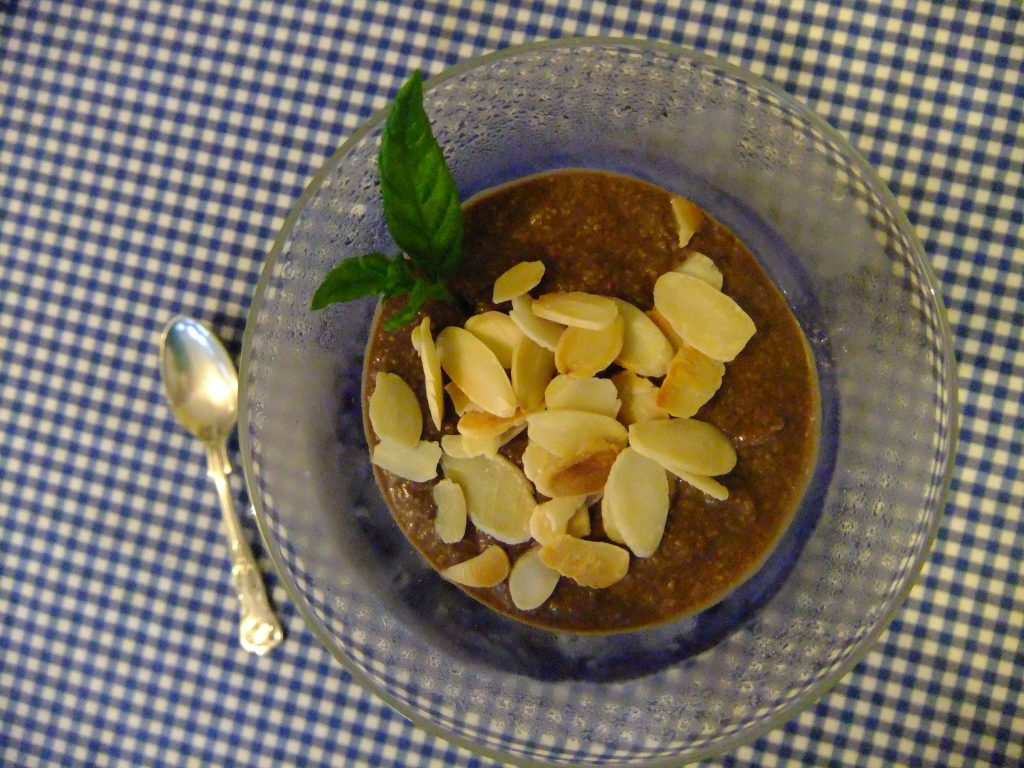
This super-simple dessert used carob powder to give a lovely, chocolatey flavour. Carob is a tropical pod that contains a sweet, edible pulp and inedible seeds. After drying, the pulp is roasted and ground into a powder. It has a flavour a bit similar to chocolate. The sugars in cashew nuts, bananas and carob make this dessert very sweet. You will get the smoothest texture if you grind the cashew nuts very finely on their own in a coffee/spice grinder before adding to the other ingredients but its still lovely if you don’t bother. I never do. the recipe is from “Cooking without” by Barbara Cousins.
For 4
115g/1 cup raw cashew nuts
15ml/1 tbsp carob powder (health stores and gourmet shops), sifted
140ml filtered water or unsweetened additive-free non-dairy milk (e.g. almond, hemp milk, coconut)
2 large bananas
1 tbsp flaked almonds
1. Blitz everything in a small food processor for 2 minutes until smooth and creamy.
2. Spoon into 4 ramekins/glasses and refrigerate minimum 20 mins or overnight.
3.Toast flaked almonds lightly on a dry frying pan until very slightly coloured. Just before serving, sprinkle on top of the carob cream.
Variation:
If you are feeling fancy, add a sprig of fresh mint and serve with a side of fresh raspberries.
Why this is better for you: This dessert is a good, easy to make “treat”. Its not intended to be eaten every day as it has far more natural sugars than you need in a healthy diet. Carob is a great substitute for chocolate. Chocolate contains at least 2 stimulants – caffeine and theobromine. These stimulate your nervous system, which, in turn, increases heart rate and contracts muscles. It’s a lot like the fight-or-flight response. The better quality chocolate (over 70% cocoa and ideally organic) contains some good antioxidants but eating more than a couple of small squares once or twice a week would be loading you up with stimulants – just like drinking coffee does.
Cashew nuts contain some protein and beneficial fats help keep your blood sugar levels (and energy and mood) even. Although bananas are high in sugars and not much else, they do contain fructo-oligosaccharides which can help feed beneficial bacteria in your gut. Beneficial bacteria are needed for mood, clear skin, healthy digestion. They are also important for your immune system to protect against infections, colds and abnormal growths.