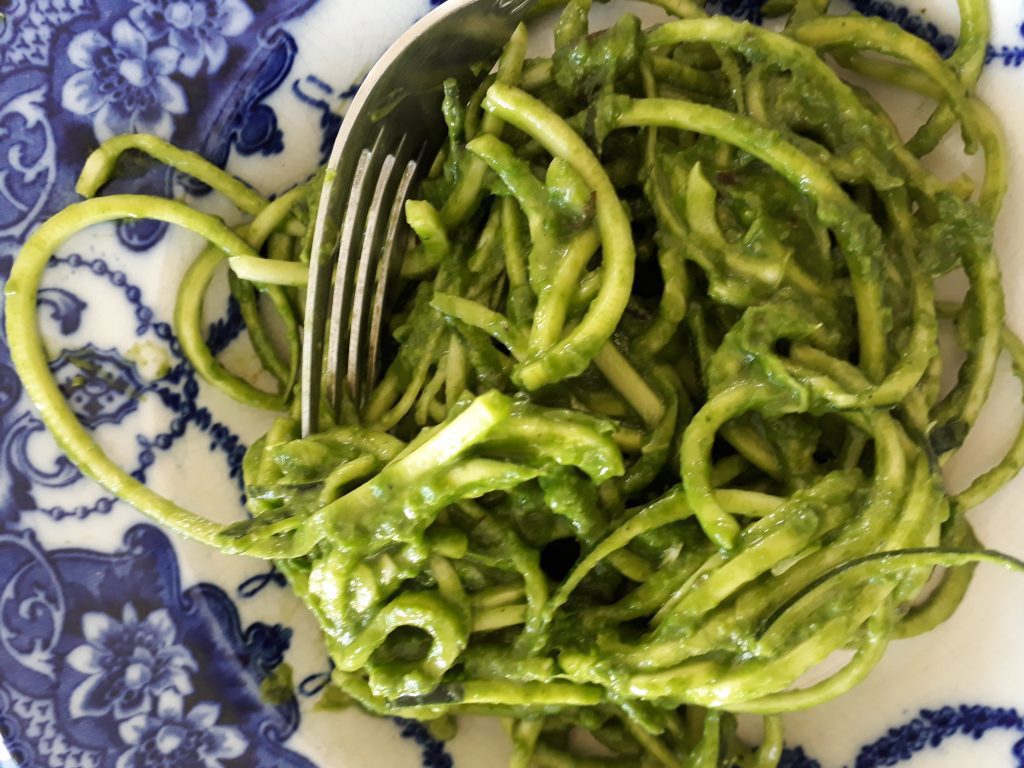
This is a lovely on a summer’s day – especially as we’re getting some decent sun here in Ireland this year. The photo doesn’t do it justice – it’s day-glo green! If you have young children and a spiralizer they will really enjoy helping make the courgetti. Otherwise just buy spiralized courgettes or at a push, take a grater and grate the courgettes lenghtwise to get very long strings. To make this a complete meal just add some protein – maybe some leftover cooked chicken, or some prawns tossed in a hot pan with a little coconut oil and a chopped red chilli until cooked. The recipe is by food blogger Aoife Howard.
To serve 3
1 tsp garlic (1 big clove) crushed
1 large bunch fresh basil, destalked (reserve a few leaves for serving)
Juice 1/2 lemon
1/2 a ripe avocado
1 tbs extra virgin olive oil
Water
5 stalks of kale, washed, destalked and roughly chopped
Himalayan salt, sea salt and black pepper
1-2 courgettes per person, spiralized
1. Food processor method: combine avocado, lemon juice, basil, olive oil and kale. Pulse the mix, gradually adding the water one tablespoon at a time until smooth Blender method: liquidize the garlic, basil, lemon juice, avocado and oil with a couple of tablespoons of water til smooth. With the motor running add the kale gradually, dropping in a few bits at a time. Blitz till everything is a vibrant, smooth green sauce. You might need to add a few more tablespoons of water to get the right consistency to coat your courgetti.
2. Add the salt and pepper to taste.
3. The courgetti can be eaten raw but if you prefer, gently warm through on a frying pan (ideally ceramic*) for 1-2 minutes until tender. If you don’t have a ceramic pan, you’ll need to put the merest smear of olive oil on your pan to stop the courgetti sticking.
4. Drizzle the pesto over the courgetti and toss well. serve topped with your choice of protein and garnish with a few torn up basil leaves.
* Why use a ceramic pan? These are pans that have a great non-stick surface but don’t add toxic teflon to your food every time you cook. Teflon is the black coating on non-stick cookware. The next best thing to a ceramic pan would be stainless steel or even cast iron.
Why this is good for you: Raw food contains enzymes which help digestion. It also retains more vitamins (C and B vitamins) than cooked food. Green foods are rich in magnesium which helps us unwind mentally and physically and is also crucial for our immune systems. Basil, garlic and extra virgin olive oil help reduce numbers of toxic micro organisms in your gut. For optimum vitality long-term we all need to eat at least half our lunch AND dinner as non-starchy veggies like greens and salad vegetables.
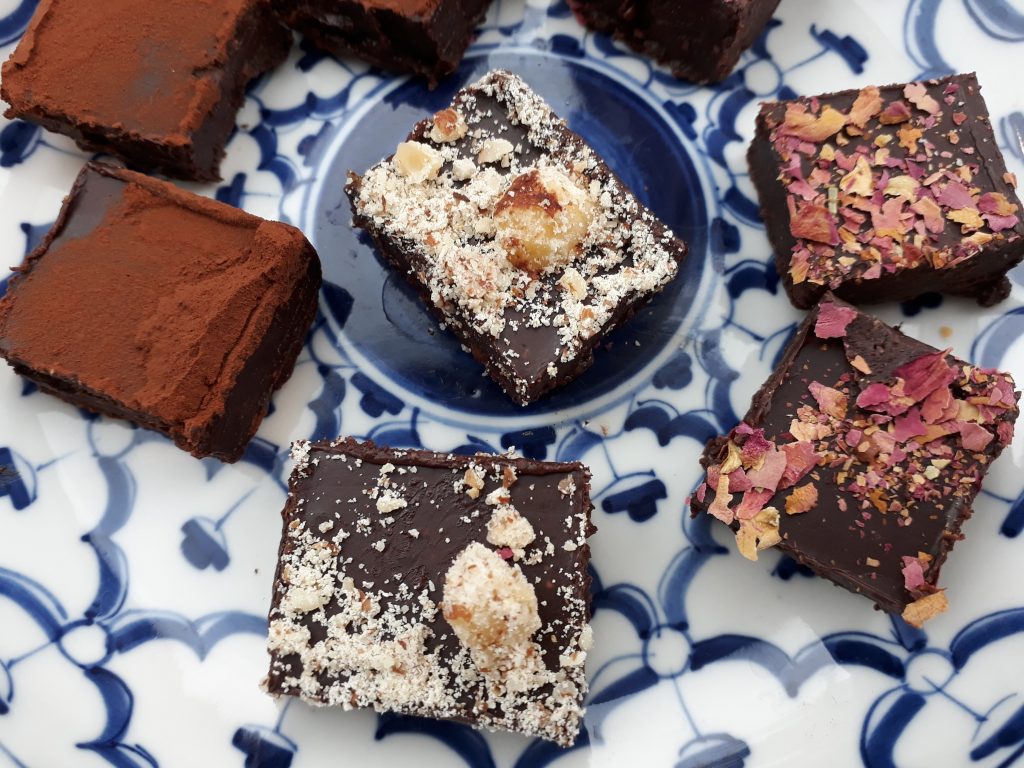
These are amazing for people who like really posh chocolate with gorgeous flavours. I have adapted Anna Jones recipe (from her book The Modern Cook’s Year) by using coconut sugar instead of standard brown sugar. It gives a gorgeous very slight crunch to the truffles. Keep them in the fridge until serving though, otherwise they melt.
This mix makes a lot (I got around 40), and will keep you in truffles for a couple of weeks.
For the flavouring, I used ground cardamom (1 teaspoon) and the rind of 1 organic orange which turned out gorgeously. I found the crushed rose petal topping looked spectacular and everyone wanted to eat those ones.
60g coconut oil, plus extra to grease
30g coconut sugar (gives a lovely crunch)
200g no-added sugar nut butter at room temperature (raw nut butter is healthiest)
200g dark chocolate (minimum 70% cocoa solids, I used 81% for a less sweet truffle)
Seeds from 1 vanilla pod or ¾ level teaspoon vanilla powder or vanilla extract
2 big pinches of Himalayan salt
20 x 20cm brownie tin (with removable base. If you have to use a normal tin then I suggest lining it with silicon baking parchment so its easier to remove from the tin)
Additional flavours (optional)
Zest of 1 unwaxed/organic orange, lemon or lime
Smoked sea salt
Seeds of 3 cardamom pods, crushed (or use ¾ teaspoon ground cardamom)
½ teaspoon ground Ceylon cinnamon
To coat
50g raw cocoa or cocoa powder
Pistachios, almonds, finely chopped
Candied ginger, finely chopped
Grated dark chocolate
Dried rose petals, crushed
1. Grease a 20cmx20cm square brownie tin with coconut oil.
2. Heat the coconut oil and sugar in a saucepan on a low heat until the oil has melted (the coconut sugar won’t really melt, I find).
3. Take the pan off the heat and add chocolate, nut butter, vanilla, salt and stir till melted. Then add the whatever flavourings you are using.
4. Pour the mix into the tin and chill for around 2 hours until set solid.
5. Turn the truffle slab out onto a cool work surface and cut into squares (mine were nearly 2cm) then gently dip each truffle in its coating to cover. I found I got half of them done then had to put everything in the fridge to harden up again is it was all starting to melt.
The truffles will keep in the fridge for up to 2 weeks in a sealed container. If you want to keep them cool when serving, place on a chilled plate in the fridge until just ready to serve.
Why these are better for you Although these contain cocoa (a stimulant) and a small amount of sugar (coconut and the normal sugar in the chocolate) they also contain some protein (from nut butter). That means they don’t upset your blood sugar and cause massive inflammation the way normal chocolates do. Coconut sugar also has a lower glycaemic load than normal sugar (doesn’t pump up blood sugar quite as much as traditional sugar AND contains more minerals). All sweet foods are still high carbohydrate though so these chocs are intended as a treat rather than a staple. Vanilla, cinnamon, cardamom, cocoa and organic citrus zest are antioxidant and anti-inflammatory – good if you want to look better and be more well for longer. Coconut oil is easier to digest than all other fats as its absorbed in a different way in your gut. It contains medium chain triglycerides which are used directly for energy by your brain.
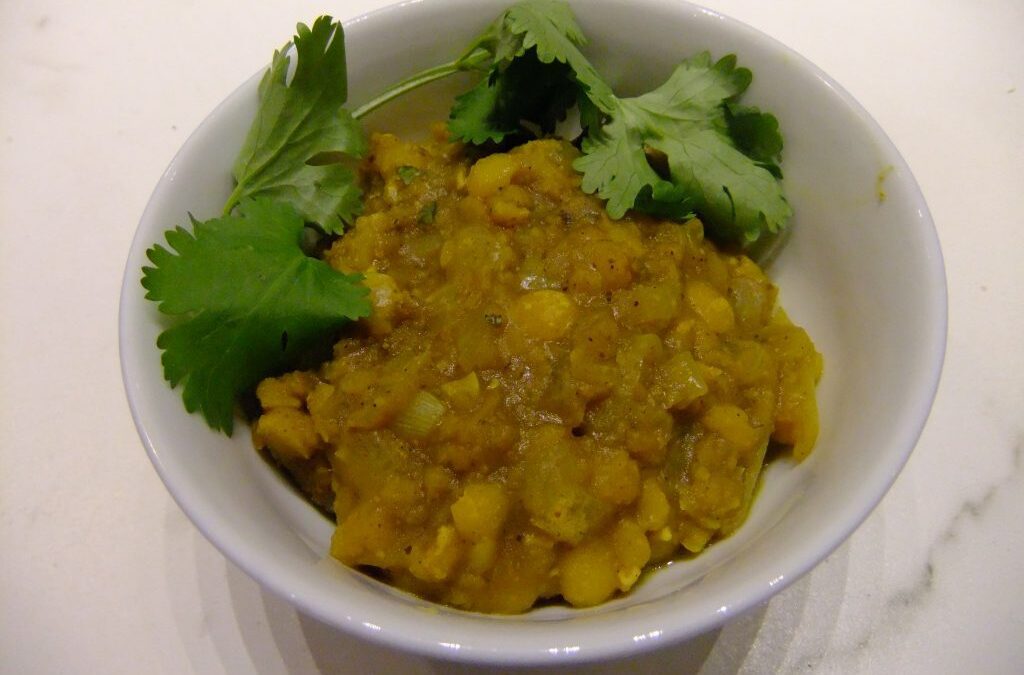
This is gorgeous. The tomatoes and apples perfectly balance the earthy flavour of yellow split peas. Like all beans and pulses this is more digestible and cooks faster if you soak the split peas overnight in clean cold water to about twice their depth in a saucepan or bowl. This is even better the next day and freezes really well.
For 2 people with 1 serving of leftovers
160g/1 mug dried yellow split peas
1/2 level tsp ground turmeric to add to the cooking water
1 tbs ghee or virgin coconut oil
1 heaped tsp cumin seeds
1 medium onion, finely chopped
1 gently rounded tsp garam masala (available in Asian stores)
1/2 level tsp ground red chilli
1/2 level tsp ground turmeric
400g chopped tomatoes, ideally fresh but canned will do
160g cooking apples, peeled, cored and chopped into 1cm pieces
Garnish:
2 tbs chopped fresh coriander
1. If using dried split peas: Place the peas with 800ml clean water and the 1/2 tsp turmeric in a heavy-based saucepan and bring to the boil over a medium heat. Skim off any foam. Reduce heat to medium, cover and cook for 25 minutes until tender.
If using soaked split peas: discard the soak water, place the peas and the half teaspoon turmeric in a saucepan with enough clean water to cover by about 2cm. Boil for a few minutes, skimming off any foam before turning down the heat to medium, cover and cook till tender for between 15 and 20 minutes. SOAKED SPLIT PEAS ARE BETTER IF YOU HAVE A SENSITIVE GUT.
2. Meanwhile heat the ghee or coconut oil in a heavy-based pan on a medium heat, add 1 dsp water along with the onions and cover with a lid. Sweat, stirring occasionally, until the onions are translucent. If its drying out too much before the onions are done, add a little more water to keep it steam-frying rather than browning or burning.
3. Stir in the rounded tsp of garam masala, 1/2 tsp of chilli and 1/2 tsp turmeric. Cook for a minutes, stirring and then add the tomatoes and the apple.
4. cook for about 25 minutes until most of the liquid has been absorbed, the apples are soft and the tomatoes have broken down.
5. Add the cooked split peas and simmer for a few minutes.
6. Garnish with the chopped coriander.
Why this is good for you This has a range of fibres that feed different categories of good gut bacteria, all of which you need to remain well. Pectin from the cooking apples, inulin from the onions, soluble fibre from the split peas all feed good bacteria. Cumin and garam masala have a suppressing effect on “bad”, pro-inflammatory bacteria in your gut. I always recommend a wide variety of plant types and herbs and spices to people who want to optimise their health and get digestive, bowel or autoimmune issues into remission. And guess what – stewed cooking apple in this recipe helps lower bowel inflammation too.
Made these a few weeks ago and thought I’d better get them up here in time for Pancake Tuesday. They are thicker than normal pancakes and really light. I love to eat them for a weekend breakfast with a dairy-free coconut yoghurt and lots of thawed mixed berries. Mix a few drops of pure stevia with yoghurt or berries if you like them sweeter. Being a bit greedy, I made double quantity here but it was too much. The coconut flour and eggs make these protein rich to give you slow burn energy.
For 4 pancakes to serve 4
(with a generous serving of berries and maybe some coconut yoghurt)
45g coconut flour
1/2 teaspoon vanilla powder or 1 teaspoon vanilla extract (if you are gluten-sensitive avoid vanilla essence)
1 medium banana (with spots if you are on SC diet)
6 medium eggs
1/2 level teaspoon Ceylon cinnamon
Blitz everything except the coconut flour in a blender until mixed up and no lumps.
Add the coconut flour, blitz till mixed.
Heat frying pan on medium heat, add a little coconut oil. Use 1/4 of the batter for each of the pancakes.
Serve with the yoghurt and berries.Variation: This is also lovely with apple stewed with Ceylon cinnamon.
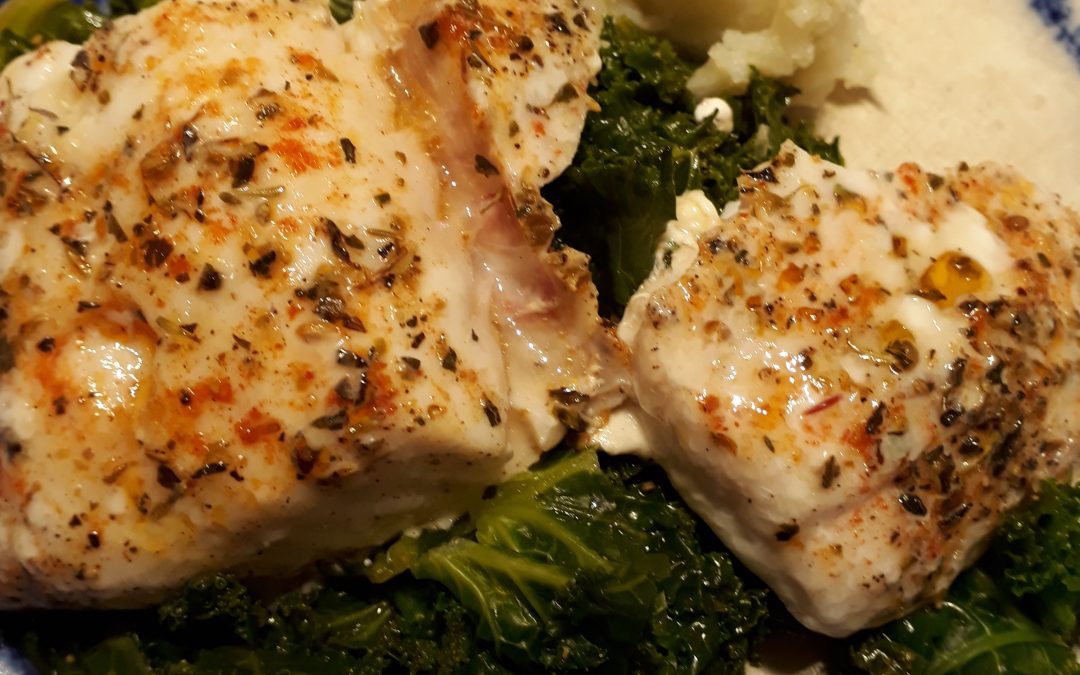
I was in a hurry last week and came up with this. Its super-fast on a weekday, provided you’ve already made up the Cajun spice mix (which only takes a couple of minutes). I’ve posted this mix already on the blog but its so good it deserves a reminder. I use it (when I remember) for grilling chicken fillets, salmon darnes and sometimes lamb chops. Rub the fish/meat with lemon juice first so the spice blend sticks on.
For 2:
2 hake fillets or darnes, about 160g each
Smoked paprika
Large bag of black kale (Cavolo nero) or curly kale
Sundried tomato paste, dairy-free red pesto (or if you are not dairy-free or on SC diet any good quality tomato pesto will do)
Fresh lemon juice (you will need about a teaspoon for the fish)
Extra virgin olive oil
Cajun spice mix:
You will need tinfoil and a roasting tin or dish
For the Cajun spice mix (store in an airtight glass jar away from heat and light)
½ level tsp chilli powder (omit or just use a pinch if you don’t like much heat)
1 level tsp Himalayan (pink) salt
½ tsp cayenne pepper
2 rounded tsp dried thyme
1 tbs each of:
Coarsely ground black pepper
Dried basil
Dried oregano
Ground coriander
Optional extra:
Cauliflower mash (see post) to serve
1. Turn on the oven to 200C.
2. Prepare the kale – wash, destalk and slice thinly. Boil your kettle and put the kale in your steamer over at least 2cm of boiling water. It can take quite a while to become tender.
3. While the kale is steaming, put the fish skin side down in an roasting dish with deep sides, rub the fish fillets with some lemon juice. Sprinkle Cajun mix and a good pinch of smoked paprika on each fillet until well coated.
4. Cover with tinfoil and give it 10 minutes in the preheated oven. After 10 minutes, test with a skewer to see if it is tender (this depends on the thickness of the fish). If not, give it another 5 minutes, covered again with the foil to stop the fish drying out.
5. Meanwhile, warm a vegetable dish for the kale. Into the dish put a generous heaped teaspoon of the pesto or paste, a dessertspoon of extra virgin olive oil and a good twist of black pepper if you have some. As soon as the kale is done to your liking toss with the pesto/paste to coat and keep warm.
6. Serve the fish on top of a pile of kale.
Optional extras:
Cauliflower mash (see blog post). This freezes well. I like to make a big batch then freeze leftovers in single portions. Reheat in a saucepan, stirring from time to time.
Why this is good for you Herbs and spices are a powerhouse of vitality-boosting qualities. They protect the food during cooking from generating toxic inflammatory compounds (e.g. amines) while also protecting ourselves and our brains from accelerated ageing. Herbs and spices have hundreds of times stronger antioxidant properties than fruit and veg, weight for weight. Kale is a dark green leafy veg so its rich in magnesium and folic acid. We need both of these for making us more resilient to stress as well as for a healthy digestive system and good skin.
This is a very traditional-tasting, rich, dark pudding. Yummy! Its more intense than my normal gluten-free pud (a light, cakey version) which is also posted on this blog. The recipe is adapted from Jamie Oliver’s gluten-free pud recipe – I removed refined sugar/golden syrup and added blackstrap molasses and low GI xylitol/coconut sugar which are healthier. Thanks Jamie! I made 2 puds from this, one in a 1 litre bowl, that would give about 6 servings, and another small one that gives 4 modest servings.
You can make this pudding well ahead of time. In fact, 25 November is Stir-Up Sunday, the traditional day to make Christmas puddings. Soak the fruit the day BEFORE you want to cook the puds. Using dried fruit free from sulphur dioxide (used to preserve colour) is preferable as it can cause digestive symptoms and headaches in susceptible people.
If you can at all, use metal or ceramic pudding bowls. Cooking puds in plastic means toxic bisphenol A (BPA) residues leech into the food – mot something you want if you care about your health. If you havn’t wrapped a pud for steaming before you will see instructions here https://www.caseys.kitchen/2016/08/28/how-to-wrap-a-pudding-for-steaming/
100 g currants
150 g raisins
110 g dried sour cherries (from health stores. dried cranberries would do instead)
50g chopped dates
1 organic lime, the grated zest and juice of
½ an organic orange , the grated zest and juice of
50g mixed peel
75 ml tea, cooled (I use 1 tbs grated ginger root with a rooibosch teabag for extra flavour but you can just use normal tea if you want. If using ginger, strain out before using the tea)
Level teaspoon mixed spice
½ level tsp ground cinnamon
½ level tsp grated nutmeg
2½ tbs (40 ml) brandy
40g xylitol (or 40g coconut sugar which gives a nice caramel flavour)
1 level tbs blackstrap molasses
1 medium or large cooking apple,peeled and grated
50g roughly chopped almonds (sometimes I use flaked to save time)
25g rice flour
25 g cornflour
110g fresh gluten-free breadcrumbs (M&S now do a round GF loaf that’s slightly better quality than most GF sliced pan breads. If you are OK with dairy products you can also use Kelkin white sourdough gluten free bread which is free of industrial emulsifiers))
1 rounded tsp gluten-free baking powder
110g gluten-free suet (available online or see below for how to make it). You can substitute butter or coconut oil but these melt quickly and do tend to boil out of the pudding but if you are dairy-sensitive and want to avoid animal products or dairy…)
2 large free-range eggs , beaten (if your eggs are medium, add an extra egg)
1 large free-range egg yolk , beaten
Butter, coconut or light olive oil to grease
In a large bowl combine the dried fruits, zests and mixed peel, then add the citrus juice, cold tea, spices and brandy, and leave overnight for the flavours to develop.
The following day, add the coconut sugar, xylitol or coconut sugar, blackstrap molasses, apple and almonds.
In a clean bowl, place the rice flour, cornflour, breadcrumbs, baking powder, coconut oil or suet and a pinch of salt. Add in the beaten eggs until you have a smooth mix, then stir into the fruit.
Grease a 1.5-litre pudding basin and pour in the pudding mixture until it’s ⅔ full. Cover the top with a circle of greaseproof paper, then with 2 pieces of foil and secure with string. Or use a 1 litre and a smaller pudding bowl to make 2 puds.
Place an upturned saucer into the base of a deep saucepan. Sit the pudding on top of the saucer, and carefully pour in boiling water to come halfway up the pudding dish. Put the lid on and steam for 8 hours (yes, 8!). According to Delia Smith DO NOT open the lids during the first half hour of steaming or you will prevent the puds from rising properly.
According to Delia you should then allow the puds to get completely cold before removing the tinfoil and paper and replacing with fresh ones, again tied with string for easy manoevering on Christmas day.
On Christmas Day: Fill a saucepan quite full with boiling water, put on the heat and when it comes back to the boil, place a steamer on top of the pan and turn it down to a gentle simmer. Put the pudding in the steamer, cover and leave to steam for 2 hrs 15 mins. You’ll need to check the water from time to time and maybe top it up a bit. When you are ready to serve the pudding, remove from the steamer and take off the wrapping. Slide a palette knife all round the pud and turn out onto a warmed plate. Place a suitable sized sprig of holly on top.
How to make suet
I had my first experiment with this in 2020 because there was only one online supplier and I was tired of buying online. Suet is made by grating or extruding leaf lard (pure, raw beef/pork fat) and then tossing it in some flour to keep it from clumping. Its best not to use lamb fat because its got a very strong flavour. Get a good butcher to save pork/beef fat for you and ask for at least double what you need because you will want to discard any pink bits. I give the pink bits to the birds who are desperate for extra calories at this time of year.
Instructions: freeze your suet, then pick through and remove any pink bits. Grate as much as you need for the recipe then toss in a teaspoon or two of gluten-free flour (rice flour will do). This can be made ahead of time and stored in the fridge. It will keep for ages.
Why this is (somewhat) better for you: Gluten has a temporary damaging effect on your small intestine even when you are not gluten-sensitive or coeliac. Gluten causes the tight junctions between absorptive cells to become unstuck for several hours. This means that undigested food particles, gut bacteria and other debris can enter your bloodstream unchecked (this is called increased intestinal permeability). This can cause symptoms as diverse as joint pain, mood problems, headaches and tiredness to name but a few. Because it inflames you this lowers your ability to fight viral and other infections.
This recipe avoids using highly refined sugars, which is good news if you want to avoid sabotaging energy levels, skin and digestive health. Blackstrap molasses is rich in chromium and iron needed for energy and metabolising the sugar. Getting the unsweetened sour cherries gives a lovely tang but also avoids the added sugars in glace fruit (including dried cranberries). The recipe still contains corn flour, which is a refined product though, and the large amount of dried fruits means Xmas pud is high in natural sugars and so is not a vitality-boosting food. Still though, sometimes, who cares…..
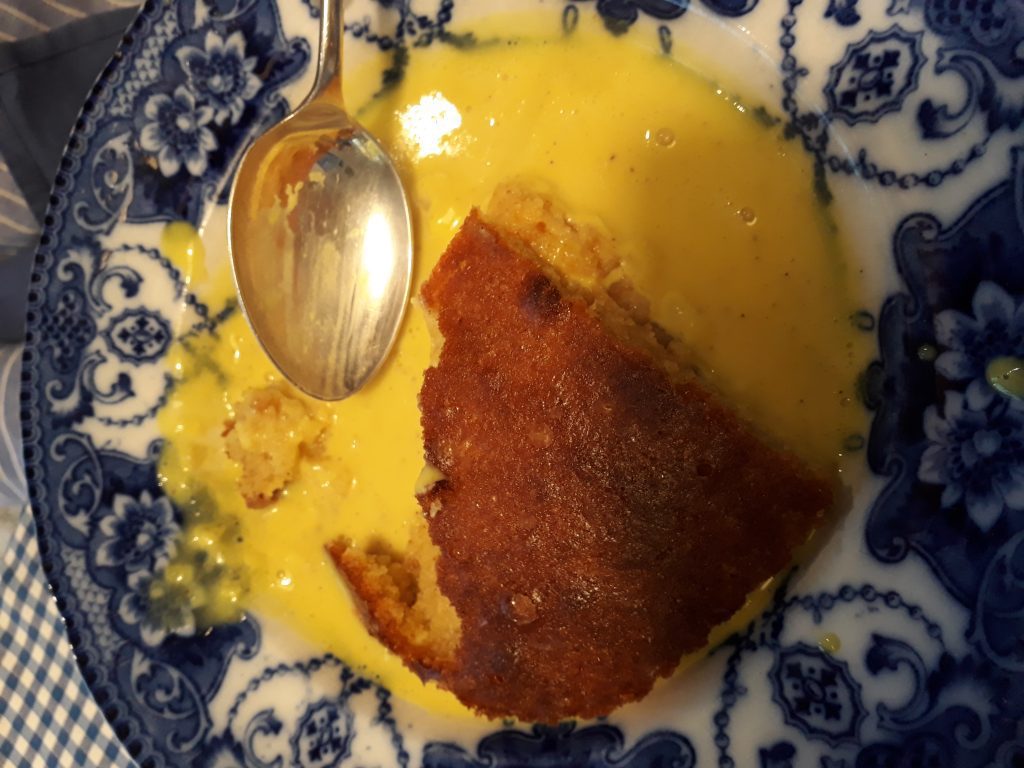
This is one of my husband’s favourite desserts, as I discovered when I made it for him last weekend. This recipe is lovely and sweet but without the usual energy-sapping sugar and wheat flour. In fact its totally grain-free but you wouldn’t know it. The sponge is really good – light and moist which usually hard to achieve using grain-based gluten-free flours.
110g butter (or use clarified butter if you are sensitive to casein protein in milk or lactose in butter)
75g xylitol or erythritol
110g ground almonds
2 large beaten eggs
2 lbs cooking apples
30 drops stevia (liquid stevia available from health stores) mixed with 1 tbs water
A little extra butter/clarified butter for greasing
Oven temperature 185C (fan 170C)
Peel, core and slice the apples. Cook them in a heavy bottomed saucepan, covered with a lid, with the stevia drops and water. Stir from time to time to prevent sticking. They should still maintain their sliced shapes.
Cool thoroughly and put into a greased dish – a pyrex dish at least 18 x 18cm square works for me.
Preheat oven to 170C.
Beat the butter/clarified butter and xylitol until pale and fluffy. Slowly add beaten eggs then fold in the ground almonds and spread over the apple.
Bake for around 40 mins. The top should be golden and a skewer inserted in the sponge should come out clean. We found it was very well done after 45 minutes even though the original recipe said to bake for an hour. If it is too coloured on top but not cooked inside, then cover the top with a flat baking sheet or a bit of tinfoil (with some holes in to let steam out) to prevent it getting too brown.
Why this is better for you: The conventional apple sponge is filled with refined sugar and white flour which depletes your essential nutrients. Nutrients needed for supporting your immune system so that its neither underactive (infections) nor over-active (autoimmune conditions e.g. hypothyroidism, arthritis). Nutrients like zinc, vitamin C, B vitamins and magnesium are important for a healthy digestive system, skin and immunity. We all have different susceptibilities. In me a magnesium deficiency brought about by a refined diet might show as anxiety or insomnia. But in you it might manifest as frequent infections. Magnesium is important for hundreds of biochemical reactions in your body.
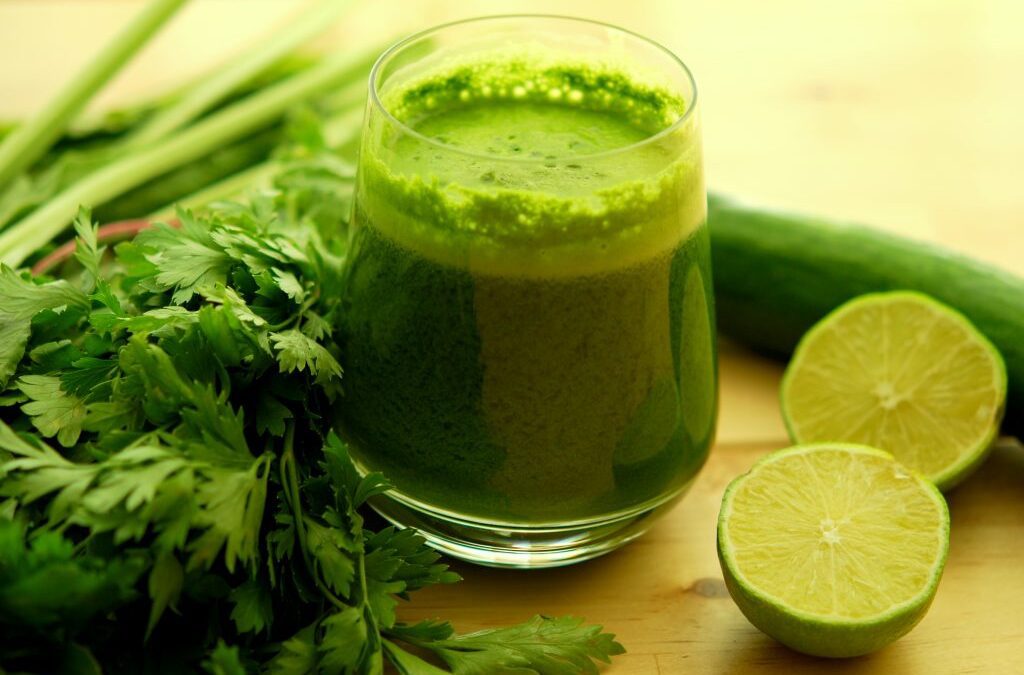
How do you increase your veggie intake to help your health if you have almost no time in the evenings to prepare a full meal or you have problems chewing? Try these green smoothies. You can even make two servings and store leftovers in an airtight glass jar in the fridge for the next day. Citrus juice and airtight containers help prevent oxidation (nutrient loss and discolouration). If you don’t like your green smoothies cold you can heat these VERY gently in a saucepan until they are lukewarm.
Garden walk (950ml or 2 servings) 1 cup baby spinach, packed
1 cup fresh parsley (any type), packed
2 large ripe tomatoes
2 tbs freshly squeezed lemon juice
½ avocado
¼ tsp chilli pepper (can cause flushing so avoid if you have rosacea)
Optional: a cupful or so of filtered, boiled and cooled, or bottled spring water to help everything go round in the blender. Wash and chop everything roughly. Blitz well.
Cucumber dill-icious soup (950ml or 2 servings)
1 large cucumber
½ a small bunch of dill (or use fresh basil if you like)
1 small avocado
3 leaves curly kale, stalks removed
1 large stalk celery
½ lime, juiced
2 cloves garlic*
Wash everything and blitz everything with a little filtered, spring or boiled and cooled water to help it all go round in the blender.
Wild green pear (makes about 500ml)
1 ripe Bartlett or Williams pear (these are lovely and sweet)
1 cup local greens (e.g. rocket, organic baby spinach, lettuce, kale, watercress, beet tops, young dandelion greens)
1 cup water
1 heaped teaspoon sunflower seeds, pumpkin seeds or 8 blanched almonds
Wash, roughly chop and blitz the fresh produce with the water and sunflower seeds.
Salad smoothie idea (or “make this up as you go along”)
Blitz a large handful of roughly chopped green leaves, a tomato, celery stick, heaped dsp chopped red onion, clove of garlic, half a red or green pepper, a glug of extra virgin olive oil, a squeeze of lemon and a generous splash of tomato juice from the carton. Add Himalayan (pink) salt and fresh ground black pepper to taste.
Green gazpacho (makes about 3 large servings)
A green take on the traditional chilled Spanish summer soup. Quite filling.
1 bunch spring onions
3 cloves garlic, roughly chopped*
1 small green pepper (stalk and seeds removed)
100g organic baby spinach ½ romaine lettuce (or any lettuce other than iceberg)
1 avocado
Small bunch fresh coriander
1 small green chilli, halved and deseeded (optional)
50g ground or blanched almonds
3 tbs extra virgin olive oil
3 tbs apple cider vinegar/1 of white wine vinegar and 2 of sherry vinegar
200ml water (filtered, boiled and cooled, or use bottled spring water)
Himalayan (pink) salt
Freshly ground black pepper to taste
Optional: 3 tbs home-made kefir or natural yoghurt (or use unsweetened soya/almond-based yoghurt if you are avoiding dairy due to sensitivity or skin health issues)*
Wash and roughly chop the veggies, leaves and herbs. Put into your blender processor with the 3 tbs olive oil, the citrus juice/vinegar, 200ml water and whizz to a thick puree. You might have to do this in 2 batches. Taste for seasoning. If it’s a bit bland then add salt, freshly ground black pepper and maybe more lemon juice/apple cider vinegar or olive oil. It’s the amount of seasonings that makes this a great soup. Serve chilled with another generous slug of extra-virgin olive oil.
For more great green smoothies buy Victoria Boutenko’s “Green Smoothie Revolution” available on www.bookdepository.com (postage is free). If you make smoothies which include a piece or two of fruit, always include some protein/good fats (e.g. nuts, seeds, avocado, coconut oil) to avoid sudden dumps of sugar in your bloodstream that compromise digestive/skin health and energy.
What’s good about green smoothies
Green veggies are rich in magnesium needed for healthy skin, a chilled mind and plenty of energy. They are giving you a range of skin-supporting, digestive-system healing and vitality boosting phytonutrients.
*Garlic is a natural antibiotic. But unlike antibiotic medications, it helps healthy bacteria in your gut to flourish and lowers levels of disease-causing yeasts and bacteria. If you are new to using raw garlic, start small and build up. As it kills off disease-causing micro-organisms you may notice some short-term flatulence! This will disappear over time as you keep going – replacing unhelpful micro-organisms in your gut with healthy ones to help every aspect of your health.
Organic vegetables and fruits, where you are eating the outer surface (rather than peeling) give you a little dose of healthy bacteria with every mouthful. In “conventional” produce good bacteria are absent. Herbicides kill the beneficial soil bacteria. Monsanto originally patented the bestselling herbicide glyphosphate as an antibiotic. It disrupts thyroid function, nerve function and is deeply toxic. Many “conventional” crops contain residues.
Why use filtered, boiled and cooled or bottled spring water in a smoothie? This is to avoid chlorine, that kills beneficial bacteria in your gut and suppresses thyroid function. Boiling allows the chlorine to evaporate. Chlorine, like fluoride, disrupts your thyroid function by blocking iodine. Iodine also helps prevent skin infections, PMS and hormonal cancers (e.g. breast, prostate).
I jumped at the chance to try this recently, and (bizarrely) it’s delicious as well as having big health benefits. Although I often use turmeric in curries and my pear breakfast smoothies I was at a loss to see where I could get it in every day. Don’t miss out the black pepper, its piperine increases the bioavailability of anti-inflammatory curcumin in turmeric by 2000%! Vary the amounts of ginger and cardamom if you want. Here I give the recipe for a latte blend as well as quantities for just one cup.
DO remember to pick milks free of emulsifiers that tear the lining of your gut – in particular carageenan (E407) , carboxymethylcellulose (E466), polysorbate 80 (E433), maltodextrin (E1400). I like Ecomil brand as it’s pretty natural.
I use dairy-free milk but if you normally drink lots of cows milk with no respiratory/sensitivity issues, use your normal…
For 1 serving (see below for quantities to make up a whole jar):
200ml/1 mug of non-dairy milk of your choice (e.g. unsweetened coconut milk, almond milk)
½ level tsp (teaspoon) turmeric powder
¼ level tsp ginger powder
¼ level tsp cardamom powder
Pinch freshly fine ground black pepper (if you leave it too coarse it just stays in bottom of the mug)
Optional: Small pinch of cayenne/chilli powder
To sweeten: a few drops of stevia or half a teaspoon of xylitol/raw honey
Heat the milk on the stove or with the electric steam milk frother on your coffee machine.
Add the spices and sweetening of your choice, whisk to mix.Variation: If you are feeling decadent, a sprinkle of Ceylon (Sri Lankan) cinnamon on top of the latte is lovely and boost vitality even more.
Turmeric latte blend (approx. 30 servings) Keep this in a glass jar with a tight-fitting lid in a dark place to keep potency and flavour.
Why this is great for you
Turmeric reduces inflammation everywhere in your digestive system. A study using 1g turmeric powder twice a day resulted in a massive improvement in remission rates in inflammatory bowel disease. 1 gram is just half a teaspoon. Turmeric is also well-studied in relieving gastritis and gastric reflux and keeping your brain healthy. What’s not to like? Ginger, like turmeric, supports your liver function to help skin, energy, bright eyes and skin. And it helps reduce nausea. Chilli powder helps thicken the mucous linings of your stomach and intestines. Chilli is used successfully in Ayurvedic medicine to heal stomach ulcers and gastritis! Its usually not the spices in “spicey food” that make people feel bad – it’s the large amounts of toxic, cheap refined oils your average Indian takeaway or restaurant uses in the cooking. Ceylon/Sri Lankan cinnamon (not “cinnamon” from supermarkets, which is in fact the cheaper cassia) has remarkable health effects. Like ginger, it can help prevent diabetes (or tackle it) but it also reduces “bad” bacteria and yeast (candida) overgrowth in your gut. Most spices have a selective effect on your gut bacteria – helping encourage growth of “good guys” and inhibiting disease-causing ones. Helpful bacteria in your gut make natural anti-bacterial and ant-viral substances like interferon gamma which travel to wherever you have an infections and help see it off.
This would be a great drink for someone with a cold or flu as it’s anti-viral and anti-inflammatory.
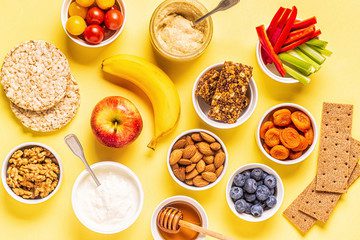
If you go for longer than 5 hours between meals you might sometimes need a snack. Most people who eat well balanced meals like on this blog don’t need to snack in-between and can fast for longer for extra health benefits. But here are some really easy snacks that give you carbohydrates (naturally sugar-containing foods like wholegrains or fruits) alongside protein/good fats (e.g. nuts, yoghurt, humous) for sustained slow-burn energy. Most of these foods are packed with nutrients to help you look and feel your best. Go for organic fruit and veg if you can – glyphosate residues on “conventional” produce kill beneficial bacteria and damage your gut. If you don’t have time for breakfast some of these snacks can fit the bill now and again if you include some fresh veg or fruit.
2 fresh apricots/plum + 4 walnut halves.
Medium pear + 8 almonds.
Medium apple + dessertspoon sunflower seeds.
Nectarine or peach + dessertspoon pumpkin seeds.
Apple + generous teaspoon almond butter straight from the jar.
Handful carrot/cucumber sticks or red pepper strips + tablespoon humous.
1-2 Nairns rough oatcakes* (available in gluten-free also) + no-sugar peanut butter.
Note: The sweet Nairn’s oatcakes/biscuits have added sugar (not a vitality-boosting snack!).
1-2 oatcakes with generous topping of humous or lots of mashed avocado.
1-2 oatcakes with thick tahini (ideally a raw brand e.g. Carly’s, from health shops).
1-2 oatcakes + cottage cheese and a sprinkle of black pepper.
Mouthful leftover cooked chicken, smoked fish + an apple, mandarin or pear afterwards.
2 fresh plums/apricots + 3 heaped tbs dairy-free “yoghurt” e.g. Coyo, Abbot Kinney’s Almond Starter, or unsweetened soya yoghurt.
Small banana blitzed with 1 cup natural yoghurt/kefir + generous pinch of turmeric or cinnamon.
For a treat try a Nakd bar from Tesco/health shops (=nuts + dried fruit).
For another treat try 1-2 squares of 80% chocolate + dessertspoon sunflower seeds or 8-10 hazelnuts. Not too often though – 80% chocolate still contains added sugar.
Now you get the idea – a great snack is a portion of slow-release carbs (e.g. oats, whole fruit, carrot sticks) + high quality protein and/or good fats
Why these snacks are better for you Carbohydrates are foods naturally high in sugars or with added sugars. Grains, root veg (potatoes, carrots) and almost all fruits are high in carbohydrates. Sugar, honey, fruit juice and white grains are even higher so aren’t a great choice in your regular diet. Carbs on their own (even from natural foods) give a quick rise in blood sugar that’s dangerous for your body. This promotes peaks and slumps in energy. But carbs combined with protein/good fats give you a better, longer-lasting slow-burn energy. Protein foods include meat, fish, beans, nuts, seeds, yoghurt, cheese, lentils and chickpeas. Great news if you want to look and feel your best for a long time to come.


 How do you increase your veggie intake to help your health if you have almost no time in the evenings to prepare a full meal or you have problems chewing? Try these green smoothies. You can even make two servings and store leftovers in an airtight glass jar in the fridge for the next day. Citrus juice and airtight containers help prevent oxidation (nutrient loss and discolouration). If you don’t like your green smoothies cold you can heat these VERY gently in a saucepan until they are lukewarm.